

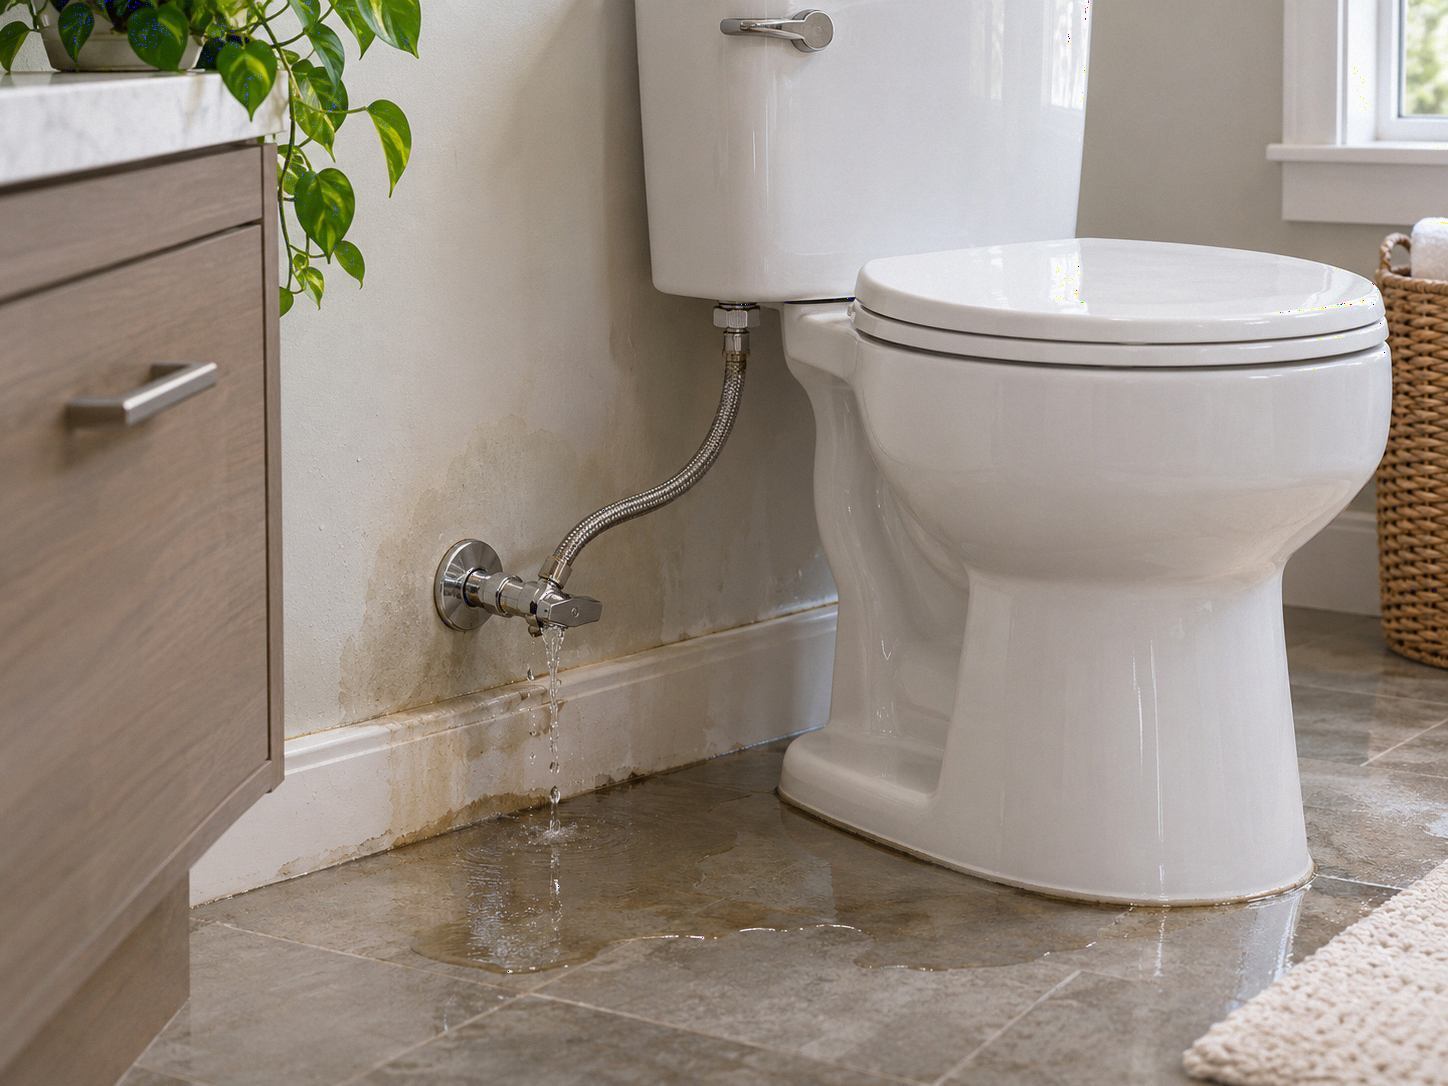
A puddle behind the toilet disappears when you wipe it up. Then it returns, even without a flush. The leak may have been running longer than anyone realized.
Toilet supply line leak water damage happens when water escapes from the shutoff valve, flexible connector, or connection beneath the tank and reaches the home's finishes or structure. Some failures release water even between flushes. Stop the flow, then check what became wet.
Quick Answer: What Should You Do Immediately?
Stop using the toilet and shut off its water supply if you can do so safely. Gently operate the accessible valve behind or beside the toilet; never force a stuck, corroded fitting. If water keeps flowing, use the home's main shutoff if it is safe to reach, then contact a qualified plumber. Afterward, assess whether water entered flooring, drywall, or nearby rooms.
- Keep children and pets away from the wet area until the water source and conditions are understood.
- Shut off the local valve. Multi-turn valves commonly close clockwise; quarter-turn valves have a short lever movement. Do not wrench a seized handle.
- If water continues, isolate the main supply if safe. Do not disconnect a hose that may still be pressurized.
- Avoid outlets, cords, lights, or equipment exposed to water. Ask a qualified electrician to evaluate affected electrical components.
- Take photographs of the connector, valve, floor, wall bases, and any water below the bathroom.
- Remove small amounts of accessible surface water only when safe; arrange plumbing repair and moisture assessment when building materials may be wet.
Never use an ordinary dry vacuum for water. A clean surface does not prove the subfloor is dry.
Where Do Toilet Supply Line Leaks Start?
The supply runs from the building pipe through the shutoff valve and connector to the tank inlet. Water can track along a hose before dripping, hiding the failed joint.
Flexible Connector or Supply Hose
A leaking toilet supply line may have a damaged hose, failing seal, corroded end, or compromised coupling. Look for moisture, corrosion, kinking, abrasion, or swelling. Do not attempt to seal a damaged pressurized connector with tape or caulk; arrange appropriate replacement.
Toilet Shutoff Valve
A toilet shutoff valve leak may originate at the stem, packing area, outlet connection, or joint where the valve attaches to the pipe. If it leaks when operated or feels seized, use the main shutoff if appropriate.
Connection Under the Toilet Tank
A failed washer, incorrect seating, or damaged fill-valve shank can cause drips beneath the tank. Some plastic fill-valve parts can crack when overtightened. A plumber should verify compatible fittings and installation requirements.
Other Problems That Look Like Supply Leaks
Tank bolts, a cracked tank, condensation on a cold tank, a toilet base seal, or a drain backup can also create a wet floor. A supply leak may continue between flushes; a drain problem may appear afterward. Neither pattern proves the cause.
A toilet bowl overflow is a separate issue involving potentially contaminated water. The guide to toilet overflow water damage explains why its cleanup cannot be treated as an ordinary supply-line spill.
How Can You Identify the Problem Without Making It Worse?
Record when the puddle developed, whether the tank is wet, and which surfaces are affected. Photograph connections after isolating water. Never loosen fittings or repeatedly flush to recreate the leak.
Start With the Leak Pattern
A puddle that reappears without flushing raises concern about the pressurized supply. Moisture that appears after a flush may involve tank bolts, the toilet base, or drainage. Water around the tank may be condensation, particularly under humid conditions, but condensation should not be assumed until leaking connections have been ruled out.
Follow the Water Path, Not Just the Puddle
Water can run along a hose or beneath baseboards. Check wall edges and floor transitions, not just the puddle.
What Can a Moisture Meter Tell You?
Material-appropriate moisture meters can help compare affected and unaffected areas, identify elevated readings, and monitor drying. The readings require interpretation; a meter does not diagnose which fitting failed.
What About Thermal Imaging?
An infrared camera reveals surface-temperature patterns, not water through flooring or walls. A suspicious pattern should be corroborated with other evidence or appropriate moisture measurements. Source repair belongs with a qualified plumbing professional; damage assessment belongs with restoration professionals when materials have absorbed water.
What Damage Can Water Cause Beneath a Bathroom Floor?
A wet bathroom floor may hide moisture beneath ceramic tile, swollen laminate, or trapped water under vinyl plank. The leak's duration and path matter more than the puddle's size.
Water Under Bathroom Tile
Water under bathroom tile can enter around plumbing penetrations, damaged transitions, or the perimeter of the room. Tile and grout do not automatically reveal whether the underlayment or subfloor was affected. Do not pry up intact tile simply because there was a leak; evaluate the substrate and drying access first.
Swollen Baseboards, Drywall, and Cabinets
Water can wick into the paper facing of drywall or the bottom edge of trim. Possible toilet leak drywall damage includes bubbling paint, swelling, a soft wall base, or staining. A vanity or hallway may also be affected.
Damage to the Ceiling Below
If the toilet is upstairs, water may travel along framing before reaching the ceiling underneath. A stain can appear away from the bathroom's exact location. Avoid sagging ceilings and wet light fixtures.
For a closer explanation of concealed floor layers, see water damage under flooring
When Is Professional Water Mitigation Necessary?
A small leak noticed quickly, contained on an intact hard surface, and cleaned safely may not require extensive restoration. The decision changes when water has run for an unknown period, traveled under a finished floor, affected drywall, soaked insulation, or reached another room. Sewage or uncertain contamination also requires a more cautious response.
Assessment helps avoid unnecessary demolition or trapping moisture behind new finishes. Scope depends on material condition and access.
Can Wet Flooring, Drywall, and Subflooring Be Saved?
Some water-damaged materials can be dried, but others need removal or replacement. EPA's guidance for clean-water damage indicates that sound drywall may sometimes be dried in place if it has no obvious swelling and its seams remain intact. Wet fiberglass insulation is generally discarded and replaced under that guidance. Hard-surface flooring also requires attention to the underflooring.
These clean-water rules do not automatically apply to contaminated losses. A swollen composite floor, degraded underlayment, unstable drywall, or material that cannot be cleaned and dried appropriately may require selective removal. Sound framing may be restorable when drying access and material conditions permit.
Read the separate guide to subfloor water damage for material-specific decisions. For walls, see wet drywall after a water leak
What Happens During Restoration After the Plumbing Repair?
A plumber repairs or replaces the failed connector, valve, or inlet. Water mitigation addresses water already absorbed into the building, not the plumbing failure itself. Urgent extraction and safety measures may be necessary before the source repair is complete, but final rebuilding should follow source control and appropriate drying verification.
A typical scope includes:
- Documenting the loss: Record the suspected water source, visible damage, photographs, and moisture observations.
- Removing standing water: Use methods suitable for the water conditions and electrical safety risks.
- Mapping affected materials: Check floor edges, wall bases, subfloor, adjacent rooms, and the ceiling below where relevant.
- Removing non-restorable material: Open assemblies selectively if damaged finishes prevent inspection or adequate drying.
- Drying restorable materials: Use suitable dehumidification, air movement, and monitoring based on the affected assembly.
- Verifying readiness: Confirm appropriate material conditions before replacing concealed finishes.
- Reconstructing: Restore necessary flooring, trim, drywall, insulation, and paint.
Not every loss requires every stage. The findings—not a standard demolition checklist—determine the scope. Read more about the water mitigation process
Could Mold Develop From a Slow Supply-Line Leak?
Yes. Persistent moisture can support mold growth on susceptible building materials. EPA recommends drying wet materials within 24–48 hours when possible to reduce that risk. This is a recommended response window, not a guarantee that mold begins at a particular hour or that an entire floor can always be dried in two days.
Musty odors or visible growth warrant investigation; color cannot identify mold species. If mold or significant contamination is present, appropriate remediation may be necessary before reconstruction. Learn more in mold after water damage in Virginia
What Does Insurance Usually Consider?
Coverage may differ for sudden accidental discharge and long-term leakage. Policy terms, deductibles, and exclusions apply; the insurer decides. The hose itself and resulting damage may be handled differently.
Keep photographs, the plumber's diagnosis, dates, material findings, itemized estimates, and receipts. Report the loss as required while taking safe steps to prevent further damage. For claims questions, read water damage insurance claim help
How Can You Help Prevent the Next Leak?
Check for drips, corrosion, kinked hoses, and damp flooring. Know the local and main shutoffs; have a stuck valve evaluated early.
Use compatible replacement parts and follow installation instructions. Do not overtighten plastic fittings or patch damaged hoses.
Toilet Supply Line Water Damage Help in Northern Virginia
A leaking supply connector can affect bathroom flooring, adjacent walls, and sometimes the room below. In Alexandria, Arlington, Fairfax, McLean, Falls Church, Vienna, and surrounding DMV communities, Total Home Rescue provides water mitigation, structural drying, mold remediation where necessary, and reconstruction for water-damaged materials.
A qualified plumber should correct the failed plumbing component. For help with resulting building damage, contact Total Home Rescue at 571-343-3444.
Frequently Asked Questions
1. What if My Toilet Shutoff Valve Is Leaking or Won't Turn Off?
Stop using the toilet and keep people away from water. If the valve handle is intact and moves normally, turn it toward the closed position gently. Many multi-turn valves close clockwise; quarter-turn valves typically have a limited travel. If the valve is corroded, seized, or begins leaking more, do not force it.
Use the home's main water shutoff if it can be reached safely, then call a qualified plumber. Never loosen the flexible connector while it may still be under pressure. If water reaches electrical devices, avoid contact and have a qualified electrician assess them.
Afterward, photograph the area and check for moisture beneath flooring or in adjoining rooms. A repaired valve does not mean the structure is dry.
2. Is Water From a Leaking Toilet Supply Line Clean or Contaminated?
The supply connector normally carries water from the household potable-water system before it enters the toilet tank. This is not the same source as a bowl overflow or sewer backup. That distinction matters, but the source is only part of the assessment.
Water can pick up dirt, microorganisms, or other contamination after contacting bathroom surfaces and concealed building materials. Long, unnoticed leaks also change the conditions. Clear-looking water does not prove sanitation.
If the source is uncertain, wastewater is present, or the affected area is extensive, avoid assuming clean-water drying methods are appropriate. Explain the source and suspected duration to the plumber and restoration team so they can assess conditions safely.
3. Can a Toilet Supply Line Leak Damage the Subfloor Beneath Ceramic Tile?
Yes. Water can enter at floor penetrations, damaged perimeter joints, and transitions around the toilet. Ceramic tile may remain visually intact while underlayment or wood subflooring absorbs moisture. A brief spill does not prove hidden damage, but a persistent leak warrants evaluation.
Watch for swollen baseboards, loosened transitions, soft areas, or new staining beneath an upstairs bathroom. Moisture may also be invisible. Meters and targeted access can help define the affected area.
Whether tile remains depends on the assembly, source conditions, material integrity, and drying access. Do not install finishes over a wet substrate simply because the tile surface looks dry.
4. How Long Does It Take to Dry a Bathroom After a Supply-Line Leak?
There is no standard timetable for every loss. A brief surface spill differs from hours of moisture entering drywall or subflooring. Drying depends on the materials, extent, humidity, temperature, and whether trapped moisture can be reached.
A fan or dehumidifier may help appropriate exposed materials, but equipment running in the room does not prove concealed layers are dry. Restoration professionals can track conditions and decide whether additional access or material removal is needed.
EPA's 24–48-hour recommendation is about responding promptly to prevent mold, not a universal promise of complete drying. Confirm the material condition before reinstalling flooring or repairing walls. If the floor still feels soft or shows recurring moisture, ask for further evaluation rather than painting over the problem.
5. How Much Does Toilet Supply Line Leak Water Damage Cost, and Will Insurance Cover It?
The total depends on both the plumbing repair and the water-damage scope. Replacing one connector is different from drying a wet subfloor, removing swollen wallboard, treating insulation, and repairing a ceiling downstairs. Visible water alone cannot establish cost.
Ask a plumber for findings about the failed part and a restoration company for an itemized assessment of affected materials, water removal, drying, and reconstruction. Documented findings explain the recommended work.
Insurance may cover certain sudden accidental water losses, but policy wording, exclusions, deductibles, and gradual-leak provisions matter. The carrier determines coverage. Keep the plumber's report, photos, estimates, drying records, and receipts, and follow reporting requirements while limiting additional damage.
Final Takeaway
A toilet supply line leak is not resolved just because the floor is dry to the touch. Shut off water safely, repair the faulty plumbing, and check where moisture may have traveled—especially beneath flooring, into drywall, and into rooms below. The right restoration scope follows the actual source, material condition, and verified drying needs.

