

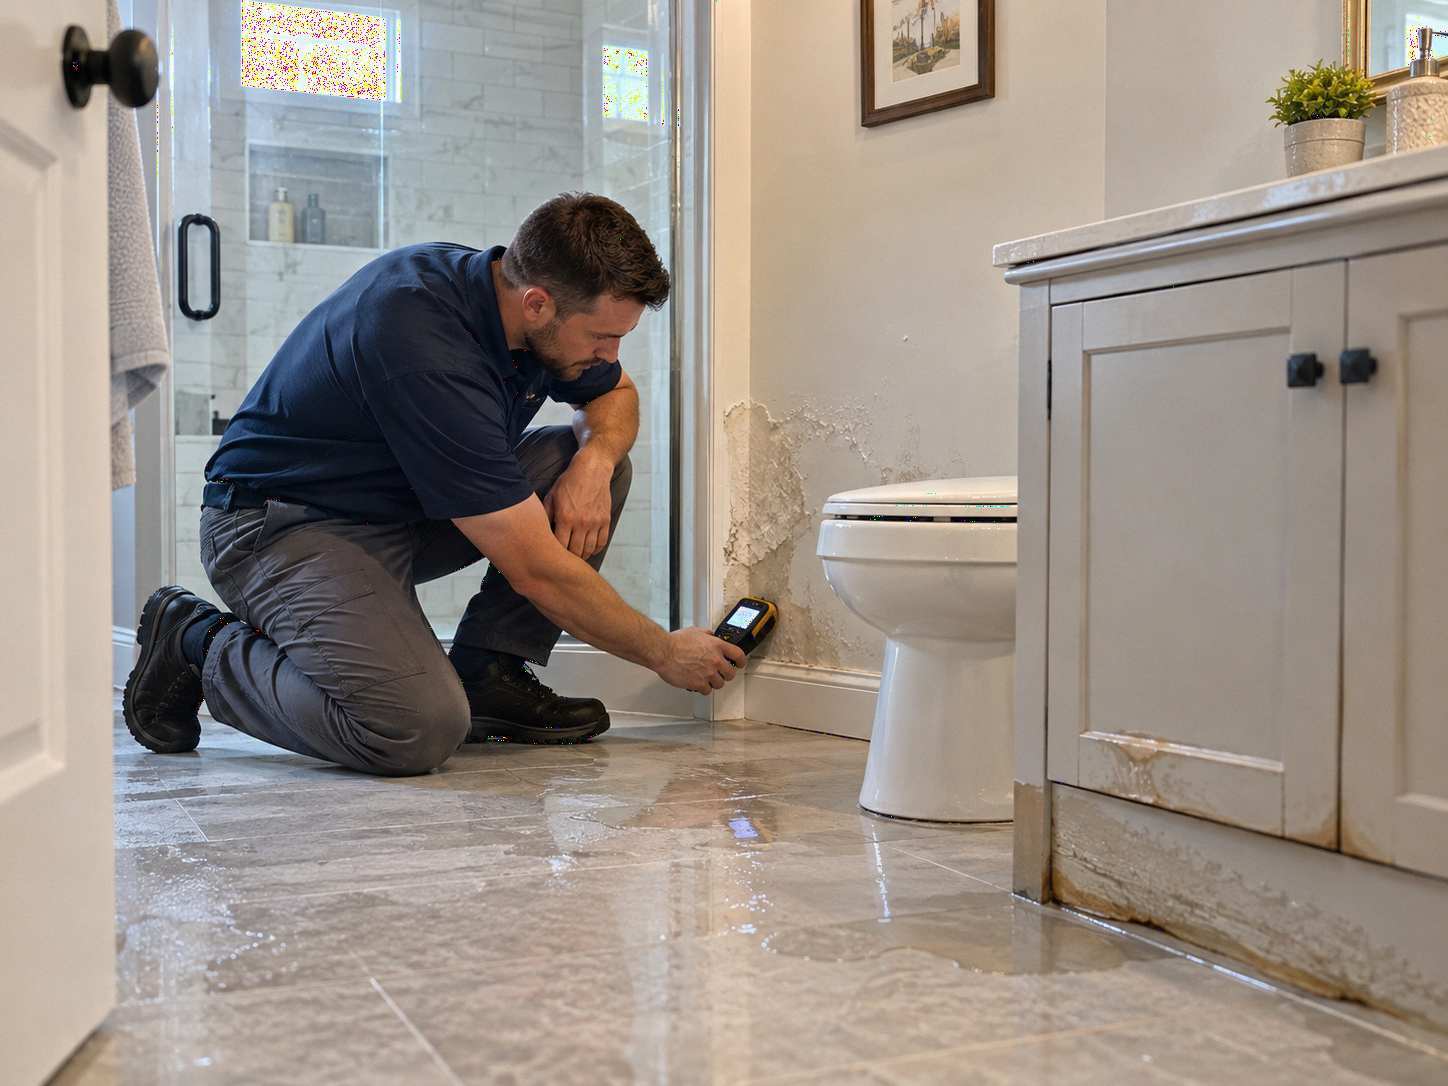
Bathroom water damage restoration should begin before stained drywall is repainted, loose flooring is replaced, or damaged trim is covered with new materials.
Bathrooms can hide moisture surprisingly well. Tile may look intact while water sits beneath the floor. A leaking vanity connection can damage the cabinet and wall behind it. A shower leak behind wall may remain unnoticed until paint bubbles in an adjoining room or a stain appears on the ceiling below.
The safest sequence is straightforward:
Stop the source → document the damage → locate the full affected area → remove standing water → evaluate hidden moisture → dry and monitor materials → begin repairs.
This sequence matters because visible water is not always the best indicator of how far a bathroom leak has spread.
Effective bathroom water damage restoration is therefore less about immediately replacing damaged finishes and more about answering three questions:
- Where did the water come from?
- Which materials became wet?
- Can those materials be properly dried, or do they require access, repair, or replacement?
For a complete overview of the restoration process see
Quick Answer: When Is Professional Bathroom Drying Needed?
Professional drying becomes more relevant when water has moved beyond an easily accessible surface.
A small splash or overflow cleaned immediately from an intact surface is very different from moisture inside drywall, subflooring, or a wall cavity.
Consider professional bathroom water damage restoration when:
- Drywall remains wet or soft
- Water may be beneath flooring
- The subfloor may be affected
- A shower leak behind wall is suspected
- Water reached the ceiling below
- Moisture is concealed beneath a vanity
- Flooring is lifting or separating
- Leak duration is unknown
- More than one room or level is affected
- Materials remain damp after surface cleanup
- The water source raises contamination concerns
The goal is not simply to place fans in the bathroom. The goal is to identify which materials are wet and establish whether those materials are actually drying.
Signs of Bathroom Water Damage
Some bathroom leak water damage is obvious. Other losses develop slowly and reveal themselves through changes in building materials.
Common signs include:
- Water around a toilet or vanity
- Soft drywall
- Bubbling or peeling paint
- Swollen baseboards
- Loose tile
- Raised flooring seams
- Damp vanity bottoms
- Recurring moisture around a tub or shower
- Ceiling stains below the bathroom
- Soft or unstable flooring
- Musty odor
- Repeated staining around plumbing penetrations
One stain does not automatically prove that an active leak is present.
Recurring symptoms are more important. If the same wall, floor, or cabinet area repeatedly becomes damp or damaged, the underlying source should be investigated instead of repeatedly repaired cosmetically.
Why Bathroom Water Damage Can Stay Hidden
Bathrooms contain multiple openings where water can move into concealed assemblies.
Moisture may travel through:
- Toilet penetrations
- Shower-valve openings
- Sink plumbing
- Drain assemblies
- Flooring edges
- Wall cavities
- Subfloor joints
- Areas beneath vanities
This is why the visible puddle should not automatically be treated as the complete boundary of bathroom leak water damage.
For more information about hidden moisture see
What Should Homeowners Do First After a Bathroom Leak?
Step 1: Stop Additional Water
If the source can be controlled safely, stop it first.
This may require shutting off:
- A toilet supply valve
- A vanity supply valve
- A fixture
- The main water supply
Avoid continuing to use a toilet, shower, tub, or sink suspected of causing the leak.
For rapidly spreading water see
Step 2: Document the Damage
Before major cleanup, photograph or record:
- The apparent source
- Standing water
- Toilet area
- Vanity
- Flooring
- Walls
- Baseboards
- Ceiling below
- Adjacent affected areas
This creates a record of the initial conditions before drying or reconstruction begins.
Step 3: Remove Standing Water
Visible water should be removed when conditions are safe.
But drying the surface does not establish that the bathroom is dry.
Step 4: Think Beyond the Surface
Ask whether moisture may have reached:
- Flooring
- Underlayment
- Subflooring
- Drywall
- Wall cavities
- Vanity cavities
- The ceiling below
For a practical response checklist see
Toilet Leak Water Damage: What Can Become Wet?
Toilet leak water damage can originate from several locations:
- Supply line
- Shutoff valve
- Tank connection
- Overflow
- Plumbing below the fixture
- Connections around the toilet
The size of the visible puddle does not necessarily indicate the full scope.
Water may enter flooring seams or openings around the fixture and move into material below.
What Should Be Checked After a Toilet Leak?
Potentially affected materials include:
- Finished flooring
- Underlayment
- Subfloor
- Baseboards
- Drywall
- Ceiling below
Does Water Around a Toilet Mean the Subfloor Is Damaged?
No.
Water exposure does not automatically mean structural damage.
The important variables are:
- Amount of water
- Duration
- Flooring system
- Openings around the fixture
- Subfloor condition
- Moisture migration
When Is Toilet Leak Water Damage More Serious?
Additional evaluation becomes more important if:
- Flooring feels soft
- Tile becomes loose
- Flooring begins to separate
- Moisture repeatedly returns
- Water reaches the ceiling below
- Leak duration is unknown
Does the Toilet Always Need to Be Removed?
No.
The fixture should be removed when access is necessary to repair the source or evaluate affected materials—not simply because water was present.
Toilet Leak Rule
Do not assume extensive demolition is required, but do not assume the floor assembly is dry just because the visible water has disappeared.
Shower Leak Behind Wall: Signs and Risks
A shower leak behind wall can be difficult to recognize because the shower itself may still look normal.
Potential causes may involve:
- Supply plumbing
- Shower-valve connections
- Drain-related problems
- Penetrations
- Failures allowing moisture into surrounding construction
Signs of a Shower Leak Behind Wall
Possible warning signs include:
- Bubbling paint
- Soft drywall
- Repeated stains
- Swollen baseboards
- Dampness on the opposite side of the wall
- Ceiling stains below
- Recurring dampness outside the shower
- Musty odor
A leak originating inside the shower can sometimes first appear in a hallway, closet, bedroom, or lower-level ceiling.
Does a Shower Leak Mean the Entire Wall Must Be Removed?
No.
The amount of access should depend on:
- Leak location
- Moisture distribution
- Wall condition
- Plumbing access
- Presence of insulation
- Drying potential
Professional bathroom water damage restoration should create enough access to address the affected area without automatically expanding demolition beyond the actual scope.
For wet-wall guidance see
Water Under Bathroom Floor
Water under bathroom floor can remain hidden beneath a finished surface that still appears intact.
A bathroom floor may contain:
- Finished flooring
- Adhesive or underlayment
- Backer or substrate
- Subfloor
- Structural framing
Water can reach lower layers through:
- Toilet openings
- Flooring transitions
- Fixture penetrations
- Edges
- Damaged seams
- Vanity areas
Can Tile Hide Water Damage?
Yes.
Tile may remain visually unchanged while moisture affects underlying or adjacent materials.
Warning signs can include:
- Loose tile
- Floor movement
- Soft areas
- Deteriorated transitions
- Moisture around fixtures
- Ceiling staining below
The appearance of the tile alone does not prove that the full floor assembly is dry.
Can Water Get Under LVP or Vinyl?
Yes.
Water-resistant flooring does not necessarily make all edges, seams, transitions, and plumbing penetrations watertight.
Moisture may enter below the finish through:
- Perimeters
- Toilet openings
- Transitions
- Plumbing penetrations
- Vanity edges
That is why water under bathroom floor should be evaluated as a complete assembly rather than simply a surface problem.
For more information see
Vanity Leak Damage
Vanity leak damage often develops slowly because both the water supply and drain connections are concealed inside the cabinet.
Potential sources include:
- Faucet supply lines
- Shutoff valves
- Drain connections
- P-trap
- Plumbing penetrations
Signs of Vanity Leak Damage
Look for:
- Swollen cabinet bottom
- Soft material
- Warping
- Delamination
- Staining
- Damp drywall behind the vanity
- Moisture underneath the cabinet
- Persistent odor
Can a Water-Damaged Vanity Be Saved?
Sometimes.
Material type matters.
Solid wood and plywood respond differently from MDF or particleboard.
A vanity that experienced brief exposure and remains dimensionally stable should not be evaluated the same way as engineered material that has swollen, softened, or delaminated.
Does Every Wet Vanity Need Replacement?
No.
The decision should consider:
- Cabinet material
- Physical condition
- Length of exposure
- Accessibility
- Drying potential
Should Vanity Repair Start Immediately?
Not before the leak and moisture conditions are addressed.
Replacing a vanity bottom does not solve moisture behind the cabinet or water under bathroom floor.
Vanity Decision Rule
Find the source → determine what became wet → evaluate physical damage → decide what can remain.
When Is Professional Drying Needed?
Professional drying becomes more useful when moisture has entered porous materials or concealed spaces.
Wet Drywall or Wall Cavities
A plumbing leak or shower leak behind wall may affect drywall, framing, or insulation.
Water Beneath Flooring
Water under bathroom floor may affect materials that cannot be evaluated from the finish surface alone.
Wet Subflooring
Water around toilets, showers, tubs, or vanities can potentially reach the structural floor assembly.
Ceiling Damage Below
If the ceiling beneath an upstairs bathroom becomes wet, the loss is no longer confined to the bathroom.
Concealed Vanity Moisture
Vanity leak damage may restrict airflow and make hidden drying more difficult.
Unknown Leak Duration
When nobody knows when the leak began, the visible damage may underestimate how far moisture has spread.
A professional drying process may include:
- Air movement
- Dehumidification
- Moisture monitoring
- Targeted access
- Adjustments as materials dry
For more information see
Bathroom Exhaust Fan vs. Professional Drying
A standard bathroom exhaust fan is designed primarily to manage humidity from showers and bathing.
It is not equivalent to a controlled drying system for water-damaged building materials.
An exhaust fan does not confirm whether:
- Drywall is dry
- Subflooring is dry
- A wall cavity is dry
- Moisture beneath flooring has been resolved
Professional drying is based on the materials and moisture conditions rather than simply circulating air in the room.
Why the First 24–48 Hours Matter
After an indoor water leak, wet materials should be addressed promptly.
The practical reason is that prolonged moisture can increase material damage and create conditions favorable to mold growth.
The often-cited 24–48-hour period should not be interpreted as a precise countdown after which every bathroom automatically develops mold.
Actual conditions depend on:
- Amount of moisture
- Material type
- Humidity
- Temperature
- Duration
The useful rule is simpler:
Do not leave wet building materials in place while waiting for visible mold to appear.
Bathroom Water Damage and Mold
Bathrooms already experience regular humidity from bathing and showering.
An additional concealed leak can create persistent moisture inside materials that normally have time to dry between uses.
A recurring toilet leak water damage issue, slow vanity leak damage, or shower leak behind wall should therefore be corrected at the source.
If mold is suspected after a leak see
For bathroom-specific mold guidance see
For concealed drywall concerns see
Wet Bathroom Drywall: Dry or Remove?
Wet drywall does not automatically require removal in every loss.
Relevant factors include:
- Water source
- Amount of moisture
- Exposure duration
- Physical condition
- Insulation
- Need for wall-cavity access
- Contamination
Possible signs of physical deterioration include:
- Softness
- Sagging
- Swelling
- Delamination
- Loss of integrity
Painting over damp drywall should not be treated as bathroom water damage restoration.
For more information see
Ceiling Water Damage Below an Upstairs Bathroom
Bathroom water can move vertically through the floor assembly.
Possible pathways include:
- Plumbing penetrations
- Floor openings
- Subfloor joints
- Wall cavities
Signs below may include:
- Brown or yellow stains
- Bubbling paint
- Damp drywall
- Sagging
- Active dripping
A ceiling stain should not simply be painted over before the upstairs source has been identified.
For more information see
Seven Mistakes That Make Bathroom Water Damage Worse
Mistake 1: Recaulking Before Finding the Source
Caulk may cover the symptom without correcting the leak.
Mistake 2: Painting a Water Stain
Paint does not dry drywall, framing, or insulation.
Mistake 3: Assuming Tile Means the Floor Is Dry
Water under bathroom floor can exist below an intact finish.
Mistake 4: Ignoring the Vanity Interior
Slow plumbing leaks can produce substantial vanity leak damage before water reaches the room.
Mistake 5: Treating Every Toilet Leak the Same
Different sources of toilet leak water damage can create different cleanup conditions.
Mistake 6: Waiting for Visible Mold
Persistent moisture should be addressed before visible growth becomes the only reason to investigate.
Mistake 7: Starting Reconstruction Too Early
Drying and moisture evaluation should come before new finishes conceal the affected area.
DIY Cleanup vs. Professional Bathroom Water Damage Restoration
A minor spill on a bathroom surface is different from water entering a wall or floor assembly.
Professional evaluation becomes more relevant when:
- A shower leak behind wall is suspected
- Water under bathroom floor may be present
- Drywall remains wet
- Subflooring may be affected
- Water reached the ceiling below
- Vanity leak damage extends behind the cabinet
- Leak duration is unknown
- More than one room is affected
- Materials remain damp after cleanup
- The water source raises contamination concerns
For a detailed comparison see
How Much Does Bathroom Water Damage Restoration Cost?
There is no reliable flat rate for bathroom water damage restoration because the scope can vary substantially.
Important cost drivers include:
- Water source
- Affected square footage
- Flooring system
- Drywall involvement
- Subfloor condition
- Vanity damage
- Ceiling damage below
- Required access
- Drying scope
- Reconstruction
A limited supply-line leak beneath one vanity is very different from a long-running shower leak behind wall that affects the floor assembly and room below.
For room-specific pricing factors see
For broader pricing information see
Does Homeowners Insurance Cover Bathroom Water Damage?
Coverage depends on the cause of the loss and the actual policy.
A sudden plumbing event can be treated differently from long-term leakage, maintenance issues, or external flooding.
Homeowners dealing with bathroom leak water damage should consider documenting:
- Apparent source
- Photos
- Videos
- Flooring damage
- Vanity damage
- Wall damage
- Ceiling damage
- Mitigation work
- Estimates
- Invoices
For more information see
For claim documentation see
FAQ: Bathroom Water Damage Restoration
1. What are the first signs that bathroom water damage may be hidden?
Hidden bathroom leak water damage may appear as soft drywall, bubbling paint, swollen trim, recurring staining, loose flooring, damp vanity material, ceiling stains below the bathroom, or repeated moisture around a fixture.
A shower leak behind wall may first become visible on the opposite side of the wall rather than inside the shower.
Likewise, water under bathroom floor may remain beneath tile, LVP, or vinyl even when the top surface looks normal.
Recurring symptoms deserve particular attention. If a stain or damaged area returns after cosmetic repair, the original moisture source may not have been resolved.
The correct response is to find the source and moisture pathway rather than repeatedly cover the visible symptom.
2. How serious is toilet leak water damage?
Toilet leak water damage can range from a small supply-line leak to moisture affecting flooring, underlayment, subflooring, baseboards, walls, or the ceiling below.
Severity depends on the source, amount of water, duration, floor construction, and how far moisture traveled.
Wiping the exposed floor does not prove that material around the fixture opening is dry.
Additional evaluation becomes more important if the floor becomes soft, tile loosens, moisture returns repeatedly, or a stain develops on the ceiling below.
The correct approach is to evaluate what is actually affected rather than automatically assuming either major demolition or no further action.
3. How can I tell if there is a shower leak behind the wall?
Possible signs of a shower leak behind wall include bubbling paint, soft drywall, recurring stains, swollen baseboards, moisture on the opposite side of the wall, lower-level ceiling damage, or persistent dampness outside the shower.
A musty odor may also justify further investigation, although odor alone does not identify the exact source.
The leak source should be identified before cosmetic wall repairs begin.
After the source is corrected, the wall assembly can be evaluated to determine whether controlled drying, limited access, or material removal is needed.
4. Does water under the bathroom floor always mean the flooring must be removed?
No.
Water under bathroom floor does not automatically require full flooring removal.
The decision depends on:
- Flooring type
- Amount of moisture
- Subfloor condition
- Physical damage
- Water source
- Accessibility
- Drying potential
A tile or resilient floor can remain visually intact while lower materials are wet.
In other situations, physical deterioration or inability to access the wet assembly may make removal necessary.
The correct decision should be based on the actual floor assembly rather than a blanket rule.
5. When is professional drying needed after bathroom water damage?
Professional drying becomes more appropriate when moisture has entered porous or concealed materials.
Examples include:
- Wet drywall
- Wet wall cavities
- Water under bathroom floor
- Wet subflooring
- Shower leak behind wall
- Ceiling damage below
- Hidden vanity leak damage
- Unknown leak duration
- Multiple affected areas
- Persistent dampness after surface cleanup
A professional drying process may use air movement, dehumidification, moisture monitoring, and targeted access depending on the actual conditions.
The purpose is not simply to place equipment in the bathroom.
The purpose is to identify which materials are wet, establish a drying strategy, and determine when the affected assembly is ready for reconstruction.
Final Takeaway
Effective bathroom water damage restoration starts before visible repairs.
Bathroom leak water damage can move beneath floors, behind walls, inside vanity cavities, and down to the level below.
Toilet leak water damage may affect more than the exposed area around the toilet.
A shower leak behind wall can remain concealed until drywall or a lower ceiling begins showing damage.
Water under bathroom floor can exist even when tile, LVP, or vinyl appears intact.
Vanity leak damage may develop gradually around hidden water-supply and drain connections.
The practical sequence is:
Stop the source → document the damage → determine where moisture traveled → remove standing water → create necessary access → dry and monitor → repair only after the moisture problem has been addressed.
That sequence helps prevent one of the most common bathroom restoration mistakes: repairing the visible finish while hidden moisture remains underneath.

