

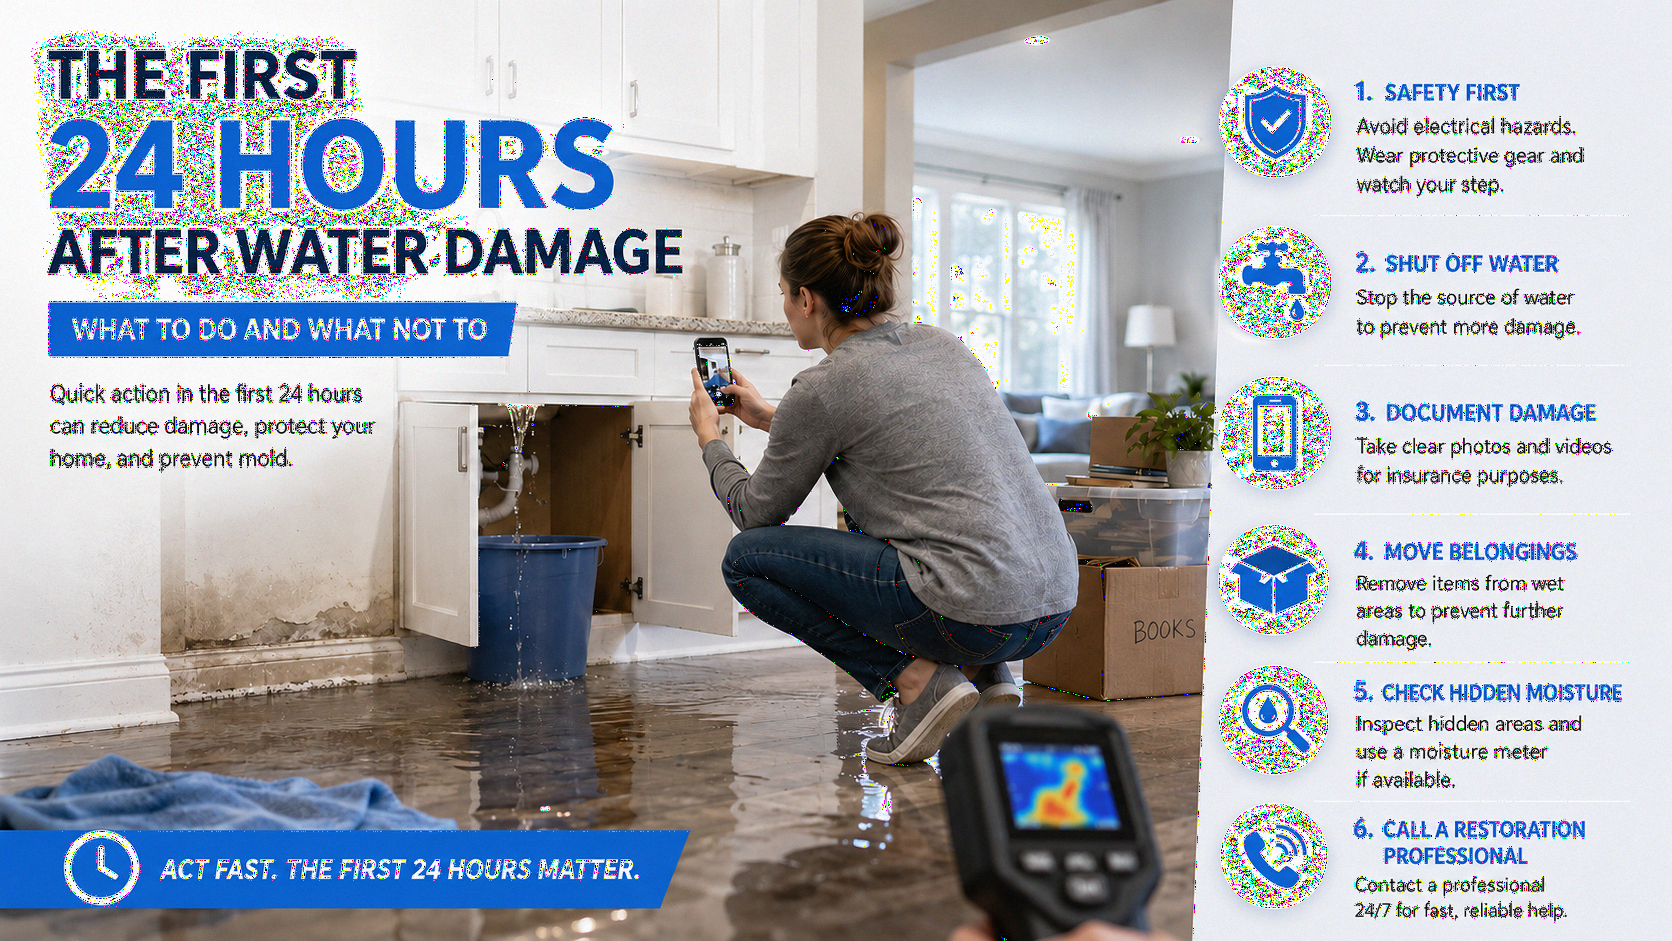
Quick Answer: What Should You Do First 24 Hours Water Damage?
If you need to know what to do first 24 hours water damage, the safest order is: protect people first, stop the source if possible, shut off water when the leak is active, avoid electrical hazards, document the damage, move belongings away from wet areas, remove standing water only if safe, check hidden moisture, and call restoration company help when water has reached drywall, flooring, insulation, cabinets, ceilings, baseboards, or multiple rooms.
The first 24 hours matter because water damage is not always obvious. Water can move under flooring, behind baseboards, inside drywall, under cabinets, into insulation, and into ceilings below the leak. A room can look cleaner after the visible water is gone while moisture remains inside building materials.
The Red Cross advises turning off water at the main valve when water pipes are damaged, and EPA guidance says water-damaged areas and items should be dried within 24–48 hours when possible to help prevent mold growth.
For the full timeline after the first day, see water damage restoration timeline
In the first 24 hours after water damage, make the area safe, stop the water source, shut off water when needed, document the damage, move belongings away from wet areas, remove standing water if safe, inspect walls, floors, ceilings, cabinets, baseboards, and rooms below, then call a restoration company if building materials are wet. Emergency water damage steps should focus on safety, source control, documentation, water removal, hidden moisture inspection, controlled drying, and avoiding early repairs. Do not paint wet drywall, patch walls, reinstall trim, replace flooring, or assume the area is dry without moisture checks.
Why the First 24 Hours After Water Damage Matter
The first day after water damage is about control. You are trying to control safety risks, control the water source, limit how far moisture spreads, protect belongings, and start the right drying process before repairs begin.
Water damage may come from:
- Burst pipe
- Appliance leak
- Water heater leak
- Toilet overflow
- Sink or vanity leak
- Ceiling leak
- Roof leak
- Supply line failure
- Basement water intrusion
- HVAC drain issue
The common mistake is treating water damage like a simple cleaning problem. Wiping up water is helpful, but it does not prove that drywall, flooring, cabinets, insulation, or ceilings are dry. The better first-day order is safety, source control, documentation, contents, water removal, moisture inspection, drying, and then repairs only after moisture is controlled.
For emergency situations, see emergency water damage restoration guide
Step 1: Make the Area Safe Before Cleanup
Before cleanup, check safety. Do not walk into standing water near outlets, cords, appliances, power strips, electrical panels, or wet electronics. If the ceiling is sagging, stay away from that area. If the water may be sewage, floodwater, chemical-related, or from an unknown source, avoid contact until the situation is inspected.
Safety checks include:
- Keep children and pets away from wet areas
- Avoid wet electrical devices
- Do not use plugged-in tools near standing water
- Watch for sagging ceilings
- Avoid unknown or contaminated water
- Be careful around slippery flooring
- Do not move heavy contents through unsafe water
These are the first emergency water damage steps because cleanup should never come before safety.
Step 2: Shut Off Water and Stop the Source
If water is still entering the home, stop the source if it is safe. You may need to shut off water at a fixture valve or at the main valve if the fixture shutoff does not stop the leak.
You may need to shut off water when:
- A pipe is actively leaking
- A supply line failed
- A toilet or sink will not stop overflowing
- A water heater is leaking
- Water continues spreading
- The source cannot be stopped at the fixture
A plumber may be needed to repair the leak source. A restoration contractor handles the water that has already entered walls, floors, ceilings, cabinets, insulation, and other materials.
For burst pipe guidance, see burst pipe water damage
Step 3: Document Damage Before Cleanup Changes the Scene
After the source is controlled and the area is safe, document the damage. This is one of the most important emergency water damage steps because cleanup, moving contents, material removal, and drying can change what is visible.
Take photos and videos of:
- The water source
- Standing water
- Wet flooring
- Wet drywall
- Wet baseboards
- Wet cabinets or vanities
- Ceiling stains
- Water in nearby rooms
- Water in the room below
- Damaged belongings
Do not delay urgent safety steps just to take photos. Stop active water first. Then document what you can before moving belongings, extracting water, removing materials, or starting repairs.
For insurance documentation, see water damage insurance claim help
Step 4: Move Belongings Away From Wet Areas
Once the area is safe, move belongings away from wet flooring, wet walls, cabinets, trim, and baseboards. Contents can absorb water, stain surfaces, block airflow, and hide wet building materials that need inspection.
Move items such as:
- Rugs
- Boxes
- Furniture
- Shoes
- Clothing
- Paper items
- Electronics
- Stored contents
- Items touching wet walls
- Items sitting on wet flooring
Do not drag soaked items into dry rooms. Do not move heavy furniture through standing water if electrical hazards may exist. Do not handle contents affected by sewage, floodwater, chemicals, or unknown water without proper protection.
Step 5: Remove Standing Water Only If It Is Safe
Standing water should be removed quickly when the area is safe. The longer water sits, the more it can absorb into flooring, drywall, trim, cabinets, and materials below.
For clean water on a safe surface, you may be able to use:
- Towels
- Mop
- Buckets
- Floor squeegee
- Wet/dry vacuum
- Extraction equipment
Do not use a regular household vacuum on water. Do not enter standing water if electricity may be involved. Do not handle sewage, floodwater, or unknown water sources without proper protection and professional guidance.
For water removal and drying steps, see water mitigation process
Step 6: Check Where Water May Have Traveled
Visible water is not the full damage. One of the most important parts of what to do first 24 hours water damage is checking moisture paths.
Check:
- Flooring seams
- Baseboards
- Drywall near the floor
- Cabinets and vanities
- Closets near the leak
- Rooms next to the leak
- Ceilings below the leak
- Basement areas below the leak
- Wall corners
- Door trim
- Under appliances when accessible
A ceiling stain below an upstairs leak may mean water traveled through flooring, framing, insulation, or drywall. A wall can feel dry on the surface while moisture remains behind paint. A floor can look normal while water is trapped under vinyl plank, laminate, hardwood, carpet pad, or underlayment.
For flooring issues, see water damage under flooring
For ceiling damage, see ceiling water damage
Why Hidden Moisture Matters
Hidden moisture can continue affecting materials after visible water is removed.
Why Baseboards Matter
Baseboards can trap moisture where drywall meets flooring.
Why Rooms Below Matter
Water from an upper-level leak can move into ceilings and walls below.
Simple Rule
If water reached walls, floors, cabinets, or ceilings, do not rely on appearance alone.
Step 7: Start Drying, But Do Not Guess
Drying should begin early, but drying should be controlled. Opening windows may help in some conditions, but humid outdoor air can make drying harder. Household fans may move air, but they do not replace structural drying equipment, dehumidification, moisture monitoring, or documentation.
Professional drying may involve:
- Air movers
- Dehumidifiers
- Moisture meters
- Humidity monitoring
- Temperature control
- Equipment adjustments
- Material checks
- Drying documentation
The ANSI/IICRC S500 standard describes procedures and precautions for professional water damage restoration in residential, commercial, and institutional buildings, including building systems and personal property inside those structures.
For structural drying, see structural drying after water damage
Step 8: Call Restoration Company Help When Materials Are Wet
You should call restoration company support when water reaches drywall, flooring, insulation, cabinets, ceilings, baseboards, or multiple rooms. A plumber may fix the leak source, but restoration handles the water damage inside the structure.
Call restoration company help when:
- Drywall is wet or soft
- Flooring is swelling or cupping
- Carpet pad is wet
- Cabinets absorbed water
- Water reached insulation
- A ceiling below is stained
- Multiple rooms are affected
- Moisture may be trapped
- The leak was hidden
- There is a musty odor
The correct order is source control first, water mitigation second, repairs after moisture is controlled. This helps prevent the common mistake of rebuilding over wet materials.
For the full homeowner guide, see water damage restoration homeowner guide
What Not To Do in the First 24 Hours
Knowing what not to do is just as important as knowing what to do. Many water damage repairs become more complicated because wet materials are covered too early.
Do not:
- Walk into standing water near electricity
- Use a household vacuum on water
- Paint over wet drywall
- Patch walls before drying
- Reinstall baseboards too early
- Replace flooring over damp underlayment
- Ignore wet cabinets
- Assume surface dryness means structural dryness
- Use only household fans for a structural water loss
- Wait several days to check hidden moisture
The first 24 hours should focus on safety, source control, documentation, water removal, moisture inspection, and proper drying.
Mold Growth 24-48 Hours: Why Fast Response Matters
The phrase mold growth 24-48 hours matters because wet materials should be addressed quickly. EPA says it is important to dry water-damaged areas and items within 24–48 hours to help prevent mold growth.
This does not mean every water damage situation automatically becomes mold at exactly 48 hours. It means moisture and time matter. The longer drywall, insulation, flooring, cabinets, and wall cavities stay wet, the higher the concern may become.
Mold concern may increase when:
- Water sits too long
- Drying starts late
- Wall cavities remain closed
- Insulation stays wet
- Flooring traps moisture
- Cabinets absorb water
- Indoor humidity stays high
- Musty odor appears
For mold after water damage, see mold after water damage Virginia
For prevention, see how to prevent mold growth Northern Virginia
For hidden signs, see signs of hidden mold in your home
When Cleanup Is Not Enough
Some water damage can be cleaned and dried with limited repairs. Other situations require selective removal before drying or rebuild can happen.
Cleanup may not be enough when:
- Drywall is soft
- Insulation is wet
- Carpet pad is saturated
- Flooring is swollen
- Cabinets are delaminating
- Ceiling drywall is sagging
- Water source is contaminated
- Mold concern is present
- Moisture readings remain elevated
The decision should be based on water source, material condition, moisture readings, and whether affected materials can dry safely in place. If drying cannot reach the wet material, selective removal may be needed before repairs.
For wet drywall decisions, see wet drywall after water leak
For mold behind walls, see mold behind drywall signs removal
First 24 Hours Water Damage Timeline
A practical first-day timeline can help homeowners avoid panic and focus on the correct order.
Hour 0–1: Make the area safe, stop the source if possible, shut off water if needed, and keep people away from unsafe areas.
Hour 1–3: Document the damage, move belongings away from wet areas, and remove standing water if safe.
Hour 3–6: Check walls, floors, cabinets, baseboards, ceilings, closets, and rooms below the leak.
Hour 6–12: Begin drying, improve air movement when appropriate, and avoid covering wet materials.
Hour 12–24: Arrange professional inspection if materials are wet, moisture may be hidden, or the area is not drying properly.
Local Water Damage and Mold Resources
The first 24 hours after water damage often connect with water mitigation, structural drying, wet drywall, flooring damage, ceiling damage, mold prevention, and insurance documentation.
FAQ: The First 24 Hours After Water Damage
1. What should I do first 24 hours water damage?
The first priority is safety and source control. If water is still entering the home, shut off water at the fixture valve or main valve if it is safe and accessible. Stay away from standing water near outlets, cords, appliances, or electrical panels. If electricity may be involved, do not enter the area.
After the area is safe, document the damage with photos and videos. Then move belongings away from wet areas, remove standing water if safe, and check floors, walls, baseboards, cabinets, closets, and ceilings below the leak. If building materials are wet, call restoration company support before starting repairs.
2. What are the most important emergency water damage steps?
The most important emergency water damage steps are safety, source control, documentation, content protection, water removal, hidden moisture inspection, and drying. The order matters because cleanup alone does not solve moisture inside walls, floors, ceilings, cabinets, or insulation.
A strong first-day response looks like this: make the area safe, stop the source, document everything, move belongings, remove standing water if safe, check hidden areas, and call for professional drying when building materials are affected.
3. When should I shut off water after a leak?
You should shut off water when a pipe, fixture, appliance connection, toilet, sink, supply line, or water heater is actively leaking and the source cannot be stopped at the fixture. If water pipes are damaged, the Red Cross advises turning off water at the main valve.
If the shutoff valve is stuck, inaccessible, or you cannot identify the source, contact a plumber or qualified professional. Do not enter standing water if electrical hazards may be present.
4. Should I move belongings after water damage?
Yes, you should move belongings away from wet areas if it is safe. Moving contents can reduce damage to personal items and expose wet flooring, walls, baseboards, or cabinet areas that need drying.
Move rugs, boxes, furniture, paper items, clothing, electronics, and anything touching wet walls or floors. Do not move heavy items through standing water if electrical hazards may exist. Do not handle contents affected by sewage, floodwater, or unknown water sources without proper protection.
5. When should I call restoration company help?
You should call restoration company help when water reaches drywall, flooring, insulation, cabinets, ceilings, baseboards, or multiple rooms. You should also call if the leak was hidden, the water source is unclear, there is a musty odor, or you cannot tell where moisture traveled.
A restoration company can inspect moisture, extract water, set drying equipment, monitor drying, remove wet materials when needed, and document the condition before repairs. A plumber fixes the leak source, but restoration handles the water damage inside the structure.
Final Takeaway
The first 24 hours after water damage should focus on safety, source control, documentation, belongings, water removal, moisture inspection, and early drying. If you need to know what to do first 24 hours water damage, remember the correct order: make the area safe, stop the source, shut off water if needed, document, move belongings, remove water if safe, check hidden moisture, and call restoration company help when building materials are wet.
Do not rush repairs. Do not paint wet drywall, reinstall baseboards too early, replace flooring over damp underlayment, or assume a room is dry because the surface looks better. The right first-day response can reduce secondary damage and help the restoration process move in the correct order.

