

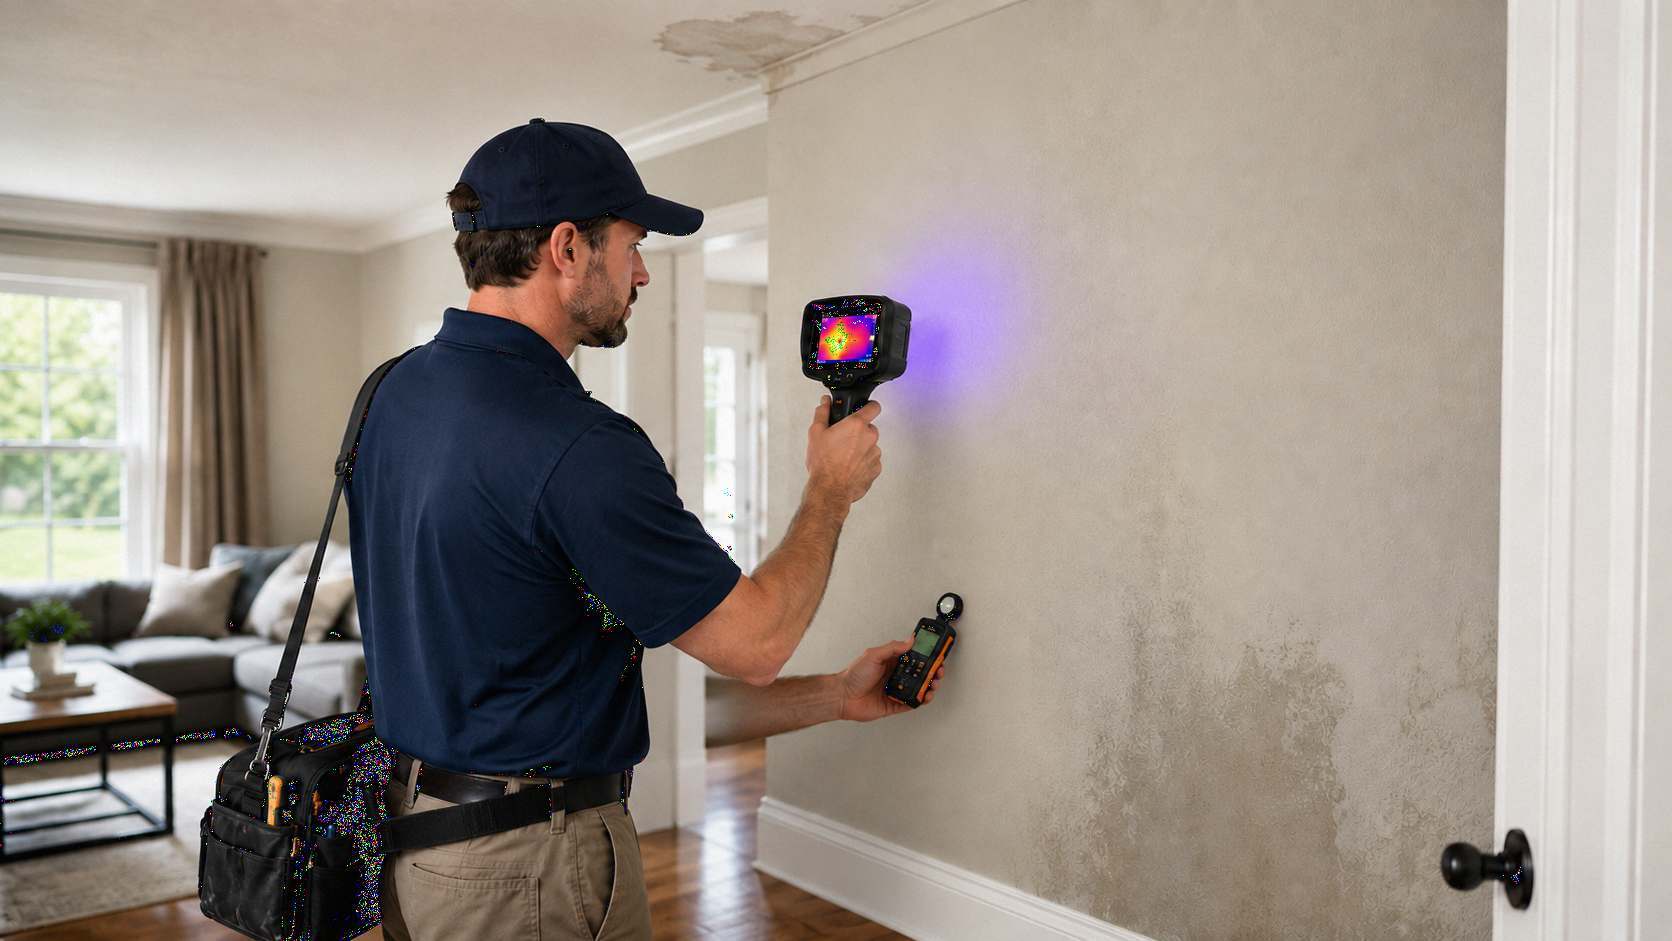
Quick Answer: How Restoration Companies Detect Hidden Water Damage
Homeowners often ask how restoration companies detect hidden water damage when a wall looks dry, a ceiling stain seems small, or flooring appears normal after a leak. Restoration professionals do not rely only on visible stains, touch, or odor. They use a structured inspection process that combines visual review, water-source tracing, a moisture meter, a thermal imaging camera, humidity checks, moisture mapping, drying equipment, and final verification before repairs begin.
A thermal imaging camera helps find suspicious surface temperature patterns that may point to hidden moisture. It does not directly see water inside walls. FLIR explains that thermal cameras cannot see moisture in walls directly, but they can detect temperature differences and patterns that may reveal water problems; FLIR also says those findings should be confirmed with a moisture meter.
A moisture meter helps verify whether a material has elevated moisture. Mass.gov explains that moisture measuring devices can measure moisture levels in materials such as plaster, wood, gypsum wallboard, concrete, and brick when the proper material setting is used.
Hidden moisture matters because wet materials can remain behind drywall, under flooring, inside cabinets, above ceilings, and around baseboards after visible water is gone. EPA’s water damage table for schools and commercial buildings gives clean-water damage response guidance within 24–48 hours to help prevent mold growth.
For the full drying process, see water mitigation process
Restoration companies detect hidden water damage by combining visual inspection, water-source evaluation, moisture meters, thermal imaging cameras, infrared water detection, humidity checks, moisture mapping, and repeat drying verification. A thermal imaging camera can show surface temperature anomalies that may suggest wet materials, but it does not directly confirm water. A moisture meter helps verify whether drywall, wood, flooring, trim, cabinets, plaster, concrete, or other materials have elevated moisture. Restoration pros use those findings to decide what needs drying, what may need removal, what should be monitored, and when repairs can safely begin.
Why Hidden Water Damage Is Easy to Miss
Hidden water damage is easy to miss because water rarely stays only where the homeowner first sees it. A dishwasher leak may run under flooring before the floor changes shape. A toilet leak may affect the subfloor before the finished surface looks damaged. A pipe leak inside a wall may wet framing, drywall, insulation, and baseboards before a visible stain appears.
Water can hide in:
- Drywall behind paint
- Baseboards and trim
- Carpet pad
- Subflooring
- Under vinyl plank, laminate, or hardwood
- Ceiling cavities
- Wall cavities
- Behind kitchen cabinets
- Behind bathroom vanities
- Around toilet bases
- Under appliances
- Inside insulation
- Below door thresholds
- Behind finished basement walls
This is why how restoration companies detect hidden water damage is such an important question. A room can look mostly dry while moisture remains inside materials. A small ceiling stain can have a larger wet area above it. A floor can feel dry on the surface while water remains trapped underneath.
EPA says hidden mold may be suspected when a building smells moldy but the source is not visible, or when there has been water damage and occupants report health concerns. That does not mean every water leak creates mold. It means hidden moisture should be inspected, documented, and dried before cosmetic repairs cover the affected area.
For drywall decisions, see wet drywall after water leak
The Professional Detection Process
The best way to understand how restoration companies detect hidden water damage is to look at the inspection sequence. A professional water damage inspection should not start with random demolition. It should start with the water source, the path of travel, affected materials, tool readings, and documentation.
A typical hidden moisture inspection may include:
- Asking when the leak was discovered
- Identifying the water source
- Checking staining, swelling, odor, and soft materials
- Inspecting rooms next to, below, and around the source
- Checking below cabinets and around baseboards
- Scanning suspicious areas with a thermal imaging camera
- Confirming suspicious areas with a moisture meter
- Comparing affected materials to dry materials
- Creating a moisture map
- Setting drying equipment when needed
- Rechecking materials during drying
- Documenting readings before repairs
This process helps avoid two expensive mistakes. The first mistake is stopping cleanup too early because visible water is gone. The second mistake is removing materials without enough evidence. A professional inspection should give the homeowner a clear answer: what is wet, what appears dry, what needs drying, and what must be checked again.
The ANSI/IICRC S500 standard is a professional water damage restoration standard used for restoration procedures in residential, commercial, and institutional buildings. Homeowners do not need to know every technical detail, but they should expect a restoration company to use a measured, documented process.
For restoration timelines, see water damage restoration timeline
Moisture Meter: The Tool That Confirms Wet Materials
A moisture meter is one of the most important tools in hidden water damage inspection. It helps a restoration technician check whether building materials have elevated moisture instead of guessing based on appearance.
A moisture meter may be used on:
- Drywall
- Wood framing
- Baseboards
- Trim
- Cabinets
- Subflooring
- Plaster
- Concrete
- Brick
- Carpet areas
- Ceiling materials
- Flooring edges
Mass.gov notes that evaluating excess moisture can be difficult when visible stains, mold growth, musty odors, or obvious leaks are not present. Moisture measuring devices can help evaluate whether moisture is uniform or connected to a less obvious source.
There are two common types of moisture meters: pin and pinless. A pin-type moisture meter uses small probes that touch or penetrate the material. It can help check a specific location more directly, although it may leave small holes. A pinless meter scans without penetrating the surface and is useful for fast comparisons across walls, floors, and ceilings.
A good technician does not make a major drying or demolition decision from one reading alone. Readings should be compared with a dry standard, meaning the same type of material in an unaffected area. For example, drywall in a dry room can help compare drywall near the leak.
For structural drying guidance, see structural drying after water damage
Thermal Imaging Camera: Finding Suspicious Temperature Patterns
A thermal imaging camera helps restoration pros scan larger areas quickly. It does not show a normal photo. It shows surface temperature differences. In water damage inspections, those temperature differences may suggest hidden moisture behind walls, under flooring, above ceilings, or around cabinets.
A thermal imaging scan can be useful when:
- A ceiling stain may be smaller than the wet area above it
- Water may have traveled behind drywall
- A cabinet leak may have spread sideways
- Flooring looks dry but may be wet underneath
- A basement wall has possible moisture intrusion
- A roof leak may have affected ceiling materials
- A leak may have crossed into another room
- A pipe leak may be hidden inside a wall
Infrared water detection is useful because wet materials may show a different surface temperature than dry materials. However, the thermal image is only a clue. FLIR explains that once a temperature difference is found, users should confirm the presence of water with a moisture meter.
For ceiling water damage, see ceiling water damage
Infrared Water Detection: What It Can and Cannot Do
Infrared water detection can be helpful, but it has limits. A thermal imaging camera works best when moisture changes the surface temperature enough for the camera to detect a pattern. If the surface temperature is not affected, the scan may not show a clear anomaly.
Infrared water detection can be affected by:
- Sunlight warming a wall
- HVAC airflow
- Cold exterior walls
- Missing insulation
- Reflective materials
- Metal studs or pipes
- Recent cleaning
- Thick wall assemblies
- Camera sensitivity
- Distance from the surface
- Technician interpretation
A thermal image cannot identify the exact leak source by itself. It cannot confirm contamination. It cannot prove that a material is dry enough for rebuild. It should be used with visual inspection, a moisture meter, source evaluation, and follow-up readings.
For flooring concerns, see water damage under flooring
Moisture Mapping: Turning Readings Into a Drying Plan
Moisture mapping is the process of identifying the full affected area. Instead of checking one wet spot, restoration pros document where water traveled and which materials need drying, removal, or monitoring.
A moisture map may show:
- Where the water started
- How far moisture spread
- Which rooms were affected
- Which materials are wet
- Which materials are dry
- Where drying equipment should be placed
- Which readings are changing over time
- Whether drying is working
- When repairs can begin
Moisture mapping matters because water damage is not always symmetrical. A kitchen leak may spread into a hallway. A bathroom leak may affect the ceiling below. A pipe burst may wet one side of a wall more than the other. A dishwasher leak may travel under flooring before it becomes visible.
Dry Standard
A dry standard is a reading from the same type of material in an unaffected area.
Affected Area
The affected area is the zone where inspection, readings, staining, or water path suggests elevated moisture.
Monitoring
Monitoring means checking materials over time to confirm whether drying equipment is working.
Simple Rule
If moisture was never measured, it is difficult to prove whether a material was wet or dry.
For insurance documentation, see water damage insurance claim help
Where Hidden Water Damage Is Commonly Found
Hidden water damage is most common near the source, but water can move beyond the obvious area. Restoration pros usually check nearby rooms, adjacent walls, flooring edges, lower materials, and spaces below the leak.
Common hidden moisture areas include:
- Wall below a pipe leak
- Ceiling below a bathroom
- Cabinet under a sink
- Toe kick under cabinets
- Flooring around a dishwasher
- Subfloor below wet flooring
- Baseboards around wet carpet
- Closet behind an affected wall
- Basement wall after rain intrusion
- Around toilet bases
- Under washing machines
- Below water heaters
- Behind finished basement drywall
- Around door thresholds
- Under trim and transition strips
A homeowner may see one stain, but the moisture map may show a larger wet area. This is common with appliance leaks, ceiling leaks, pipe bursts, and water trapped under flooring.
For appliance leak guidance, see appliance leak water damage
For pipe burst guidance, see burst pipe water damage
Why Hidden Moisture Matters Before Repairs
Repairs should not cover wet materials. Painting wet drywall, installing new flooring over a damp subfloor, closing a wet wall cavity, or reinstalling cabinets too early may trap moisture.
Hidden moisture may lead to:
- Odor
- Staining
- Swollen trim
- Paint failure
- Flooring movement
- Cabinet damage
- Drywall deterioration
- Mold concern
- Repeat repairs
- Insurance documentation problems
EPA guidance says wet or damp spots should be cleaned and dried within 48 hours, and moisture problems should be controlled to help prevent mold. For homeowners, the practical lesson is simple: do not rush cosmetic repairs until moisture has been checked.
For mold after water damage, see mold after water damage Virginia
What Homeowners Should Expect From a Professional Inspection
A professional hidden water damage inspection should be clear and documented. The technician should explain what was checked, what tools were used, where elevated moisture was found, and what the next step should be.
A strong inspection may include:
- Visual inspection of affected areas
- Source discussion
- Moisture meter readings
- Thermal imaging scan
- Photos of affected materials
- Moisture map
- Dry standard comparison
- Equipment recommendation
- Drying plan
- Recheck schedule
- Final drying verification
Homeowners should ask direct questions:
- What materials are wet?
- What areas are dry?
- Was the thermal image verified with a meter?
- What readings were compared?
- Is drying possible, or does material need removal?
- How will dryness be confirmed before repairs?
- What documentation will be kept?
For choosing a contractor, see how to choose water damage restoration company
Local Water Damage and Mold Resources
Hidden water damage often connects with wet drywall, water under flooring, ceiling leaks, appliance leaks, burst pipes, structural drying, moisture documentation, insurance records, and mold prevention.
FAQ: How Restoration Companies Detect Hidden Water Damage
1. How do restoration companies detect hidden water damage behind walls?
Restoration companies detect hidden water damage behind walls by combining visual inspection, moisture meter readings, thermal imaging, source tracing, and moisture mapping. The technician checks for stains, swelling, soft drywall, bubbling paint, damaged baseboards, musty odor, and likely water paths.
A thermal imaging camera may show a temperature pattern that suggests moisture behind or within a wall. However, that image does not confirm water by itself. A moisture meter helps verify whether the suspicious material has elevated moisture. If readings are elevated, the contractor can decide whether the wall can be dried in place, monitored, or opened for drying and repair.
2. Does a thermal imaging camera actually see water?
No. A thermal imaging camera does not directly see water inside walls, floors, or ceilings. It shows surface temperature differences. Wet materials may appear different because moisture can affect temperature through evaporation and heat transfer.
The key is confirmation. A cold or warm pattern may be moisture, but it may also be caused by air leaks, missing insulation, HVAC airflow, sunlight, reflective surfaces, or metal behind the wall. That is why professional infrared water detection should be paired with moisture meter readings and visual inspection.
3. What is the difference between a pin and pinless moisture meter?
A pin-type moisture meter uses small probes that touch or penetrate the surface. It can help check a specific point in the material and may provide more direct moisture information depending on the meter and material setting. The downside is that it may leave small holes.
A pinless moisture meter scans without penetrating the surface. It is useful for quick, non-invasive scanning across walls, floors, and ceilings. The limitation is that pinless readings are often relative, so they work best when compared against a dry area of similar material.
4. Can hidden water damage exist if the surface feels dry?
Yes. Hidden water damage can exist even when the surface feels dry. Drywall, subflooring, cabinets, insulation, and flooring systems can hold moisture below the surface. A wall may feel dry on the painted side while moisture remains near the baseboard or inside the cavity.
That is why restoration pros do not rely only on touch. A floor can look dry while water remains below vinyl plank or laminate. A ceiling stain may be smaller than the wet insulation above it. A cabinet may look normal from the front while the back or toe kick is wet.
5. Why should moisture be checked before repairs begin?
Moisture should be checked before repairs because covering wet materials can trap moisture. Painting wet drywall, installing flooring over a damp subfloor, closing a wet wall cavity, or reinstalling cabinets too early may lead to odor, staining, swelling, material failure, or mold concern.
A professional drying process should include moisture readings, documentation, equipment monitoring, and final verification before rebuild. This helps homeowners make better repair decisions and gives the claim file stronger support if insurance documentation is needed.
Final Takeaway
Understanding how restoration companies detect hidden water damage helps homeowners avoid guessing after a leak. Visible stains, puddles, and wet flooring are only part of the story. Water can travel behind walls, under flooring, above ceilings, behind cabinets, and into materials that look dry from the outside.
A moisture meter helps verify whether materials are wet. A thermal imaging camera helps locate suspicious temperature patterns. Infrared water detection helps guide the inspection, but it should be confirmed with direct readings. The best restoration process uses inspection, measurement, moisture mapping, drying, documentation, and final verification before repairs begin.

