

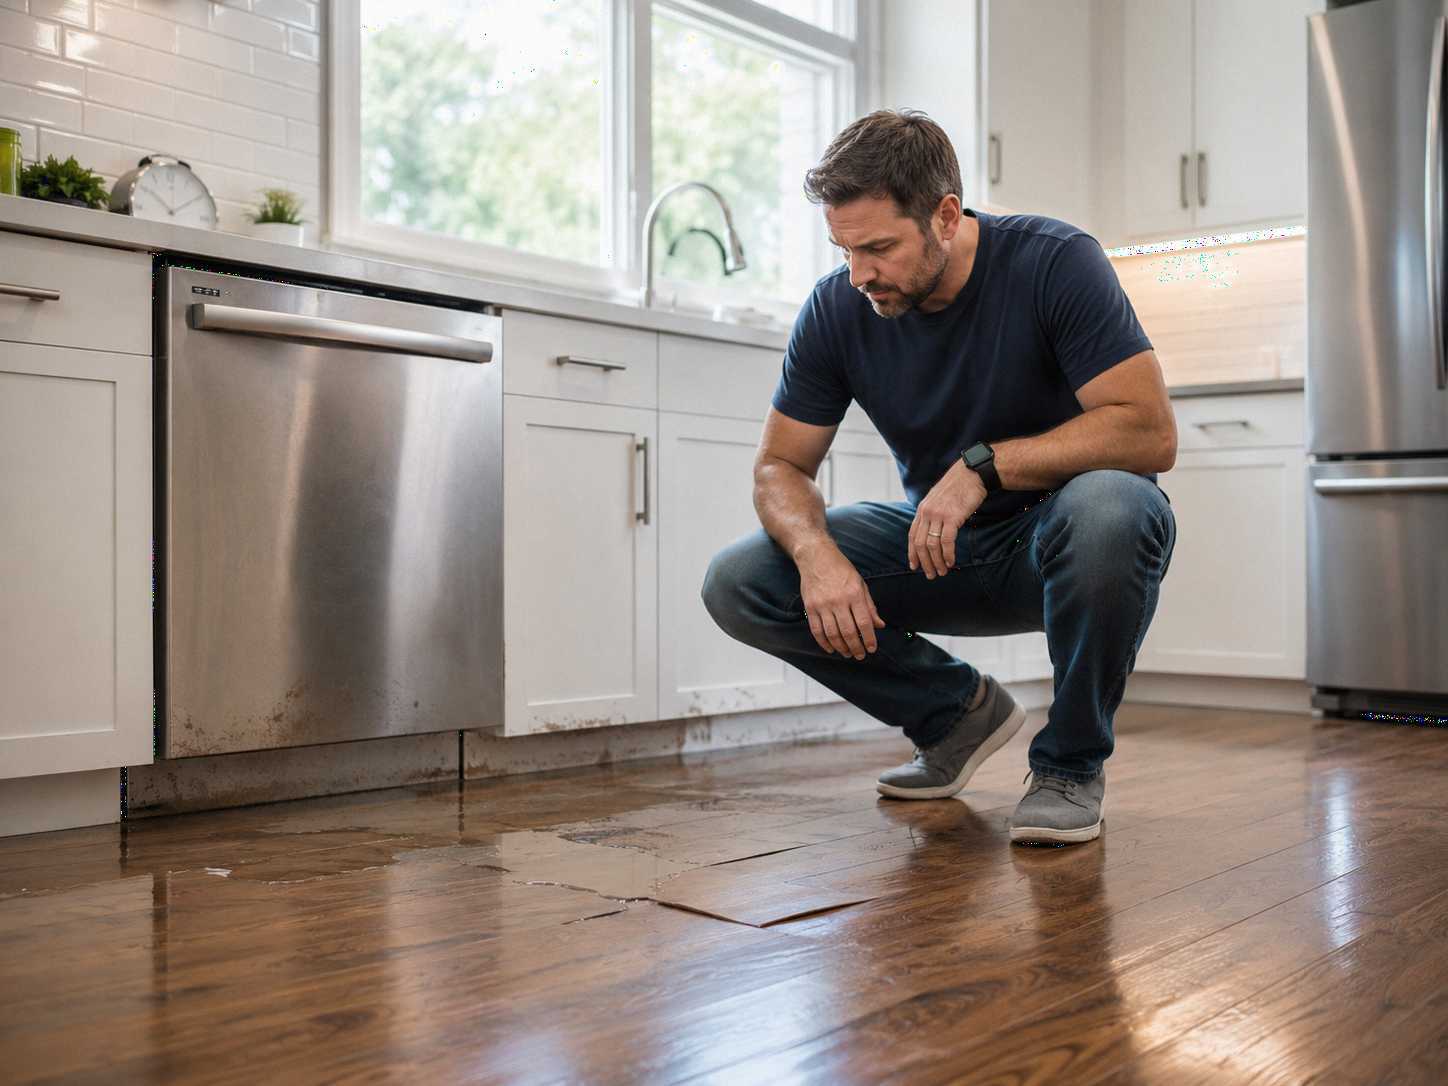
Kitchen water damage restoration should begin before new flooring, cabinets, drywall, or paint are installed.
A kitchen leak can look minor while water spreads beneath a dishwasher, cabinet toe kicks, finished flooring, underlayment, drywall, and subflooring. The visible puddle may be only part of the affected area.
The safest order is:
Stop the leak → document the loss → identify the full wet area → remove standing water → check hidden moisture → dry and monitor affected materials → begin repairs.
This sequence applies to most kitchen leak water damage, including dishwasher leaks, refrigerator supply-line failures, sink plumbing problems, garbage disposal leaks, and broken pipes.
The biggest mistake is starting cosmetic repairs before determining whether moisture remains behind or beneath the visible finishes.
For the complete restoration process see
What Should You Do First After Kitchen Water Damage?
When water appears in a kitchen, focus first on stopping additional damage rather than immediately replacing damaged finishes.
1. Stop the Water Source
If it can be done safely, stop the source of the leak.
Depending on the problem, that may mean shutting off:
- A local appliance valve
- A sink supply valve
- A refrigerator water line
- A dishwasher supply
- The main household water supply
Do not continue running an appliance or fixture suspected of causing the loss.
For rapidly spreading water see
2. Consider Electrical Safety
Kitchens place water lines close to appliances, wiring, outlets, and electrical connections.
Avoid standing water when energized equipment may be involved. Do not pull out connected appliances simply to inspect behind them unless it is safe to do so.
3. Document the Initial Conditions
Before significant cleanup, photograph or record:
- The apparent source
- Standing water
- Wet flooring
- Damaged cabinets
- Appliances
- Baseboards
- Drywall staining
- Adjacent rooms
- The level below if applicable
NAIC advises homeowners filing claims to document damage with photos and videos and keep records of damaged property.
4. Remove Standing Water When Safe
Visible water should be addressed promptly.
However, drying the puddle does not mean kitchen water damage restoration is complete.
The next question is more important:
Where did the water travel before it was discovered?
5. Check Beyond the Visible Wet Area
Water may already be beneath cabinets, appliances, flooring, or drywall.
For immediate response steps see
Why Kitchen Leak Water Damage Is Often Hidden
Kitchens contain multiple enclosed areas and layered materials.
Water can migrate beneath:
- Cabinet toe kicks
- Cabinet bases
- Dishwashers
- Refrigerators
- Finished flooring
- Underlayment
- Subflooring
- Baseboards
- Drywall
- Wall penetrations
This is why kitchen leak water damage can extend well beyond the location where the homeowner first sees water.
A puddle is evidence of the leak. It should not automatically be treated as the boundary of the loss.
For a detailed explanation of hidden moisture detection see
Dishwasher Leak Kitchen Damage
Dishwasher leak kitchen damage is especially easy to underestimate because the appliance sits inside a concealed opening between cabinets.
Possible leak points include:
- Supply hose
- Water connection
- Drain hose
- Door seal
- Pump area
- Internal fittings
- Drain connection beneath the sink
Water may collect beneath the dishwasher before enough escapes into the exposed kitchen area to be noticed.
Where Can Dishwasher Water Travel?
Depending on the construction, water can move:
- Under the dishwasher
- Beneath neighboring cabinets
- Under flooring
- Into underlayment
- Into subflooring
- Behind baseboards
- Into an adjoining room
- Through the floor assembly
That means dishwasher leak kitchen damage should not be evaluated only by looking at the floor directly in front of the appliance.
For more information see
Does a Dishwasher Leak Mean the Entire Floor Must Be Replaced?
No.
A small leak discovered quickly can produce a very different scope from a recurring leak that has been running beneath an appliance.
Replacement depends on the flooring material, physical condition, amount of moisture, exposure time, subfloor condition, and how far water migrated.
Should Homeowners Pull the Dishwasher Out?
Not automatically.
Dishwashers normally have water, drain, and electrical connections. Moving one incorrectly can create another leak or an electrical concern.
The goal is appropriate access—not moving equipment without considering the connections.
Water Under Kitchen Cabinets
Water under kitchen cabinets is one of the most important hidden conditions after a kitchen leak.
Cabinet bases and toe kicks restrict both visibility and airflow.
Even when the exposed kitchen floor looks dry, moisture may remain beneath:
- Cabinet bases
- Toe kicks
- Finished flooring
- Underlayment
- Subflooring
- Wall plates
Does Water Under Kitchen Cabinets Mean Cabinets Must Be Removed?
No.
The presence of water under kitchen cabinets does not automatically mean an entire cabinet run should be removed.
The decision depends on:
- Cabinet construction
- Water source
- Amount of water
- Exposure duration
- Flooring layout
- Physical cabinet condition
- Accessibility
- Drying potential
Some cabinet systems allow access through removable toe kicks, sink cabinet openings, dishwasher openings, or refrigerator spaces.
Other conditions may require additional access.
The goal of kitchen water damage restoration is not maximum demolition. It is enough access to understand and address the affected area.
Can Water Under Cabinets Dry Without Removal?
Sometimes, depending on the assembly and conditions.
Drying is influenced by:
- Airflow
- Humidity
- Temperature
- Material type
- Amount of moisture
- Access
- Length of exposure
A dry-looking cabinet face does not prove the material underneath it is dry.
For structural drying information see
Cabinet Water Damage: Repair or Replace?
Cabinet water damage should be evaluated by material and condition.
Different cabinet materials behave differently when exposed to water.
Solid Wood and Plywood
Some wood components may remain structurally usable after limited moisture exposure and appropriate drying.
MDF and Particleboard
Engineered wood products can swell, soften, or lose dimensional stability when water penetrates them.
Veneers and Finishes
Moisture can result in:
- Delamination
- Edge swelling
- Warping
- Veneer separation
- Finish failure
- Staining
Signs of More Serious Cabinet Water Damage
Look for:
- Significant swelling
- Soft cabinet bottoms
- Permanent deformation
- Delamination
- Structural weakness
- Loose veneer
- Persistent dampness
Does Every Wet Cabinet Need Replacement?
No.
A cabinet that became briefly wet and remains stable is different from a cabinet base that has swollen, softened, or delaminated.
Should Cabinet Repairs Begin Immediately?
Not before the moisture problem is understood.
Replacing a toe kick or refinishing the cabinet does not solve water trapped underneath it.
Cabinet Decision Rule
Determine what is wet first. Determine what is physically damaged second. Repair or replace only after both questions are answered.
Kitchen Floor Water Damage
Kitchen floor water damage can involve more than the visible surface.
A typical floor system may contain:
- Finished flooring
- Adhesive or locking system
- Underlayment
- Subfloor
- Structural framing
Water may reach lower layers through seams, transitions, appliance openings, perimeters, and cabinet areas.
For additional information see
Hardwood Kitchen Floor Water Damage
Wood reacts to moisture by changing dimension.
Possible signs include:
- Cupping
- Crowning
- Buckling
- Raised boards
- Dark staining
- Gaps
Visible distortion does not automatically determine whether hardwood should be repaired or replaced.
The condition of the boards, subfloor, installation, moisture levels, and drying potential all matter.
For a detailed comparison see
Laminate Kitchen Floor Water Damage
Laminate flooring may experience permanent deformation when moisture reaches its core.
Common warning signs include:
- Swollen edges
- Raised seams
- Separation
- Warping
- Soft areas
Drying can remove moisture but may not reverse permanent swelling.
Can Water Get Under LVP or Tile?
Yes.
A water-resistant or waterproof finish does not automatically make the complete floor assembly waterproof.
Water may enter through:
- Perimeters
- Transitions
- Penetrations
- Damaged seams
- Appliance openings
- Cabinet edges
That is why kitchen floor water damage should be evaluated as an assembly, not only by inspecting the top surface.
What Does Kitchen Water Damage Restoration Include?
The exact kitchen water damage restoration process depends on the source, affected materials, water conditions, and extent of moisture.
A typical sequence may include:
Step 1: Source Control
Stop additional water from entering the structure.
Step 2: Moisture Assessment
Determine how far water traveled and which materials are affected.
Step 3: Water Extraction
Remove standing or extractable water where appropriate.
Step 4: Access Concealed Areas
Create access when wet materials are hidden behind or beneath finishes.
Step 5: Material Evaluation
Identify materials that may remain and materials that have sustained physical damage or are otherwise unsuitable to retain.
Step 6: Structural Drying
Air movement and dehumidification may be used based on the actual conditions.
Step 7: Monitoring
Drying progress should be evaluated rather than assumed.
Step 8: Reconstruction
Flooring, cabinets, drywall, trim, and finishes can then be repaired as appropriate.
For the mitigation process see
Why Repairs Should Not Start Too Soon
Starting reconstruction too early can hide the original problem.
Examples include:
- Installing new flooring over a wet subfloor
- Painting damp drywall
- Replacing toe kicks before checking beneath cabinets
- Closing wall cavities before moisture is addressed
- Reinstalling trim over wet material
EPA states that water-damaged areas and items should be dried within approximately 24–48 hours to help prevent mold growth and identifies moisture control as the central principle of mold prevention.
This does not mean mold automatically appears at a precise 48-hour mark.
It means wet materials should be addressed promptly instead of waiting for visible growth.
Wet Kitchen Drywall: Dry or Remove?
Wet drywall does not automatically need to be removed in every case.
Important factors include:
- Water source
- Moisture condition
- Exposure duration
- Material strength
- Contamination
- Insulation behind the wall
- Need for cavity access
Warning signs can include:
- Softness
- Sagging
- Swelling
- Deterioration
- Delamination
- Persistent moisture
Painting over damp drywall is not a drying method.
For a detailed guide see
Kitchen Water Damage and Mold
Mold should not automatically be assumed after every kitchen leak.
However, EPA states that indoor mold growth depends on moisture and that moisture control is the key to mold control.
Does Mold Automatically Start After 24 or 48 Hours?
No.
The EPA's 24–48-hour guidance is a recommendation for prompt drying, not an exact mold-growth timer.
Actual conditions depend on:
- Moisture
- Temperature
- Humidity
- Material
- Duration of exposure
The practical lesson is simple:
Do not wait for visible mold before addressing wet building materials.
For more information see
For hidden warning signs see
Seven Mistakes That Can Make Kitchen Water Damage Worse
Mistake 1: Treating the Visible Puddle as the Entire Loss
Moisture may already be beneath flooring or cabinets.
Mistake 2: Installing New Flooring Too Soon
New flooring should not cover unresolved kitchen floor water damage.
Mistake 3: Assuming Cabinets Blocked the Water
Cabinets can conceal water under kitchen cabinets instead of stopping it.
Mistake 4: Ignoring the Level Below
Water may travel through the kitchen floor assembly.
For related problems see
Mistake 5: Treating Every Leak the Same
Water source and contamination can change the appropriate cleanup approach.
Mistake 6: Waiting for Mold
Moisture can require attention before visible mold appears.
Mistake 7: Starting Reconstruction Before Mitigation Is Complete
Mitigation and reconstruction are separate stages.
When Is DIY Kitchen Water Cleanup Not Enough?
A small surface spill is different from water entering building materials.
Professional evaluation becomes more relevant when:
- Water under kitchen cabinets is suspected
- Flooring is swelling or buckling
- Hardwood is cupping
- Cabinet bases are swollen
- Drywall is wet
- Subflooring may be involved
- Water reached another room
- Water reached the level below
- Leak duration is unknown
- The source may be contaminated
- Moisture persists after surface cleanup
- Dishwasher leak kitchen damage extends into concealed areas
For a detailed comparison see
How Much Does Kitchen Water Damage Restoration Cost?
There is no reliable flat price for kitchen water damage restoration.
Cost can vary based on:
- Affected square footage
- Leak source
- Water conditions
- Cabinet involvement
- Flooring type
- Subfloor damage
- Drywall damage
- Required access
- Drying scope
- Reconstruction
A small leak confined beneath one sink cabinet should not be compared directly with dishwasher leak kitchen damage affecting multiple cabinet sections, flooring, and subflooring.
For room-specific cost factors see
For broader pricing factors see
Does Homeowners Insurance Cover Kitchen Water Damage?
Insurance coverage depends on the cause of the loss and the terms of the individual policy.
NAIC states that homeowners policies generally cover damage caused by a sudden and accidental discharge from a plumbing system, while coverage can depend on maintenance requirements, exclusions, and other policy conditions.
Homeowners documenting kitchen leak water damage should consider keeping:
- Photos
- Videos
- Source information
- Damaged-property records
- Mitigation documentation
- Contractor estimates
- Invoices
- Communications with the insurer
NAIC also recommends notifying the insurer promptly when filing a claim and documenting damaged property.
For more information see
For claim documentation see
FAQ: Kitchen Water Damage Restoration
1. What should I do first after discovering kitchen water damage?
Stop additional water when it can be done safely.
Then document the initial conditions and determine whether water may have traveled beyond the visible area.
Check the cabinet bases, appliance openings, flooring, baseboards, nearby walls, adjoining rooms, and the level below when relevant.
Removing visible water is important, but complete kitchen water damage restoration requires understanding which materials became wet.
Do not rush into flooring replacement, drywall repair, or cabinet reconstruction simply because the exposed surface looks dry.
The better order is source control, moisture assessment, mitigation, drying, monitoring, and then repairs.
2. How serious is water under kitchen cabinets?
Water under kitchen cabinets can be significant because cabinet bases restrict airflow and hide the condition of the materials below.
The exposed floor may look completely dry while the flooring, underlayment, or subfloor beneath the cabinets remains wet.
This does not automatically mean all cabinets need to be removed.
Access may sometimes be possible through toe kicks, sink cabinet openings, or appliance spaces.
The correct decision depends on the water source, amount of moisture, cabinet construction, flooring system, physical damage, accessibility, and drying potential.
The important rule is not to assume a concealed area is dry simply because it cannot be seen.
3. Does dishwasher leak kitchen damage mean the floor must be replaced?
Not necessarily.
Dishwasher leak kitchen damage can range from a localized event beneath the appliance to moisture extending beneath multiple cabinet sections and continuous flooring.
Whether flooring requires replacement depends on:
- Flooring material
- Amount of water
- Exposure duration
- Physical deformation
- Moisture below the surface
- Subfloor condition
- Extent of migration
Laminate with permanent core swelling may require a different decision from hardwood that still needs drying and evaluation.
LVP or tile may look normal even while lower layers are wet.
The floor assembly should therefore be evaluated before either complete replacement or no action is assumed.
4. Can kitchen cabinets with water damage be saved?
Sometimes.
The outcome of cabinet water damage depends strongly on material and physical condition.
Solid wood, plywood, MDF, particleboard, veneers, and other cabinet materials behave differently after water exposure.
Warning signs include significant swelling, delamination, softness, permanent deformation, structural weakness, or persistent moisture.
A cabinet that was briefly exposed and remains stable is different from one that has swollen and lost structural integrity.
The correct approach is neither “remove all wet cabinets” nor “save everything.”
Evaluate the actual material, exposure, access, and condition first.
5. How do I know when my kitchen is ready for repairs?
A kitchen is not necessarily ready for reconstruction because the visible surfaces feel dry.
After kitchen floor water damage, moisture can remain below finished flooring.
After water under kitchen cabinets, concealed assemblies may still require evaluation.
After a dishwasher or refrigerator leak, water may remain behind the appliance.
Before installing new flooring, closing drywall, replacing trim, or completing cabinet repairs, the affected materials should be evaluated for remaining moisture and physical damage.
EPA emphasizes prompt drying of wet materials because moisture control is central to preventing indoor mold growth.
In practical terms:
Mitigation first. Reconstruction second.
Final Takeaway
Effective kitchen water damage restoration is not simply about making the kitchen look repaired.
It is about making sure the water problem has actually been addressed before new finishes hide it.
Kitchen leak water damage can spread beyond the visible puddle.
Dishwasher leak kitchen damage can move beneath appliances, flooring, and neighboring cabinets.
Water under kitchen cabinets matters because access and airflow are restricted.
Kitchen floor water damage may involve underlayment and subflooring in addition to the visible surface.
Cabinet water damage should be evaluated according to material, physical condition, exposure, accessibility, and drying potential.
The practical sequence is:
Stop the source → document the loss → identify the complete affected area → remove water → access concealed moisture when necessary → dry and monitor → repair only after moisture conditions are addressed.
Following that sequence helps prevent one of the most frustrating outcomes after a kitchen leak: paying for new repairs and then opening the same area again because unresolved moisture remained underneath.

