

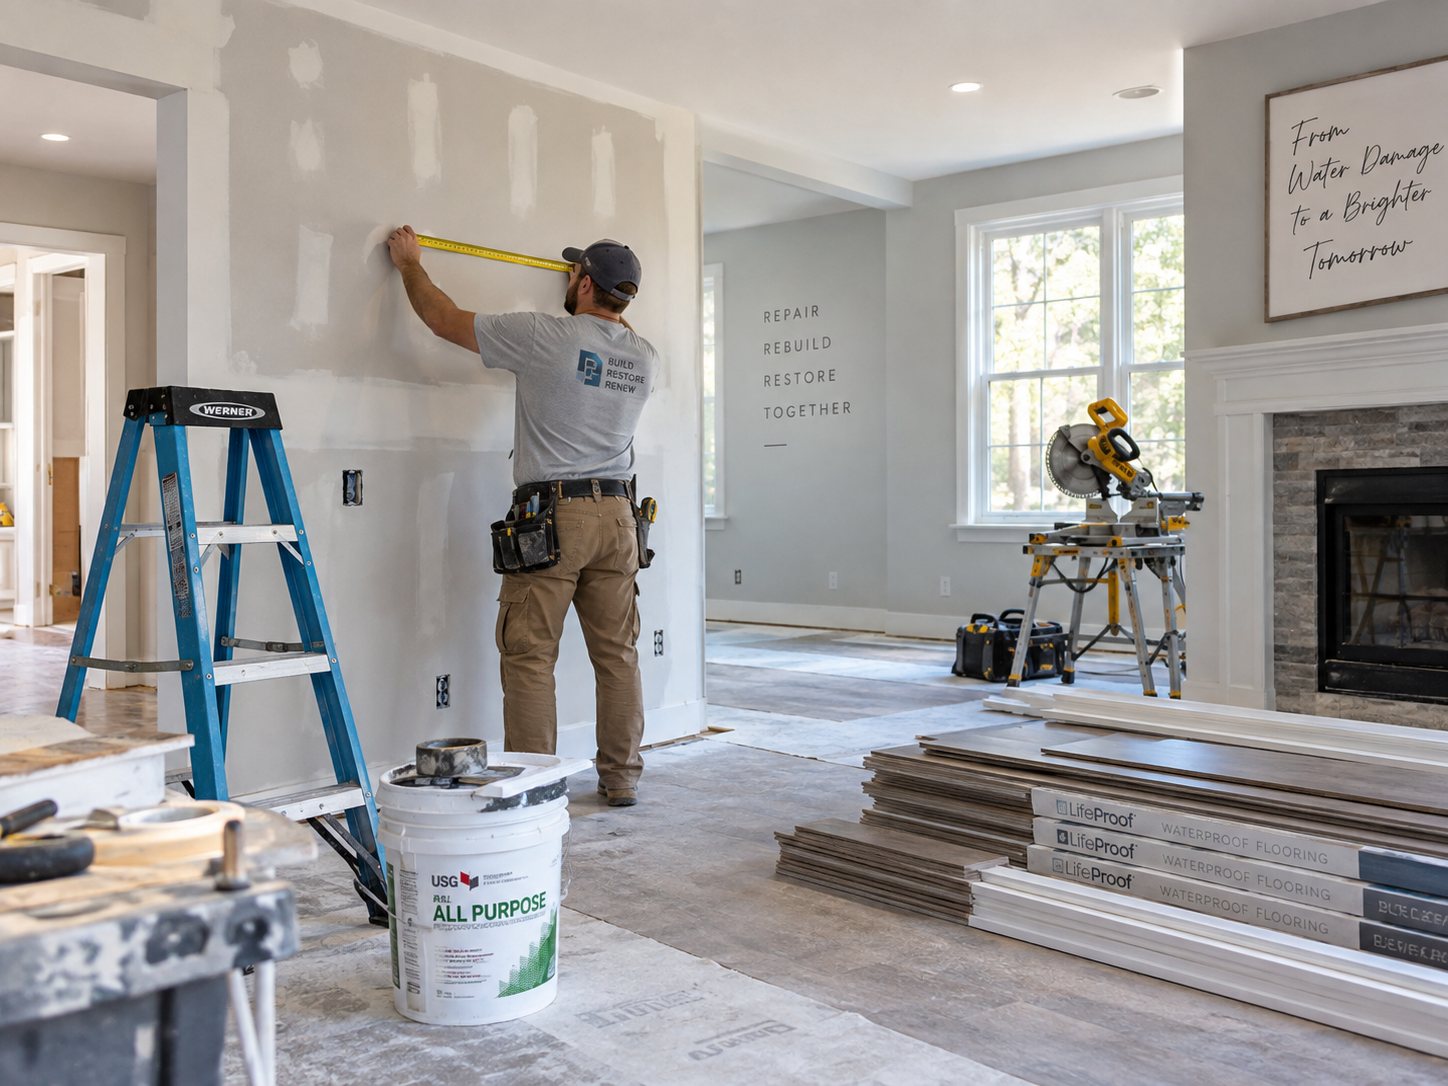
Reconstruction after water damage begins when the emergency mitigation work is finished and the affected structure is ready for permanent repairs.
The water may be gone. The dehumidifiers may be removed. Moisture readings may be back within acceptable conditions.
But the property can still look unfinished.
After mitigation, homeowners are often left with:
- Sections of drywall removed
- Open wall cavities
- Missing insulation
- Exposed framing
- Bare subfloor
- Removed baseboards
- Detached cabinets
- Open ceiling sections
- Unfinished paint transitions
That is where the rebuild begins.
A proper reconstruction after water damage does more than make the room look normal again. It restores the building materials that were removed or damaged during mitigation while making sure new finishes are not installed over unresolved moisture.
The typical process is:
- Verify drying is complete
- Confirm the repair scope
- Complete any remaining structural repairs
- Replace insulation
- Repair walls and ceilings
- Restore flooring
- Reinstall cabinets, trim, and fixtures
- Prime and paint
- Complete final inspection and cleanup
The order matters.
The structure should be dry before it is closed, and the hidden materials should be restored before the cosmetic finishes go back on.
Quick Answer: What Happens After Water Damage Drying Is Complete?
Once drying is complete, the project moves from water mitigation into reconstruction.
Depending on the loss, the rebuild after water mitigation may include:
- Insulation replacement
- Drywall repair after water damage
- Ceiling repair
- Flooring replacement after leak damage
- Cabinet repair or replacement
- Baseboard and trim installation
- Painting
- Fixture reinstallation
- Final cleaning
The exact reconstruction scope depends on what was removed during mitigation and what materials were permanently damaged.
For the earlier stage see water mitigation process
Why Reconstruction Should Not Start Too Early
The most important part of reconstruction happens before new materials are installed.
The contractor should confirm that the structure is ready to rebuild.
That usually means checking that:
- The original leak has been repaired
- Standing water is gone
- Unsalvageable materials were removed
- Remaining framing has dried
- Subfloor conditions are suitable for new flooring
- Hidden cavities have been evaluated
- Any mold concerns have been addressed
For more information see structural drying after water damage
A Room Can Look Dry Before It Is Ready to Rebuild
Surface appearance can be misleading.
Drywall may look normal while framing behind it remains damp.
A floor may feel dry while moisture remains underneath the finished material.
If reconstruction starts too soon, new materials can cover unresolved moisture.
What Can Happen If You Rebuild Too Early?
Possible problems include:
- Swelling
- Delamination
- New staining
- Musty odors
- Damaged paint
- Flooring failure
- Mold growth
- Additional demolition later
Drying Equipment Removal Is Not the Same as Reconstruction Approval
Drying equipment may be removed because the mitigation phase is complete.
Reconstruction Still Needs a Proper Scope
The damaged area should then be reviewed from a construction perspective.
Permanent Repairs Should Follow Moisture Verification
That sequence helps prevent a cosmetic repair from hiding a moisture problem.
Water Mitigation vs Reconstruction: What Is the Difference?
Mitigation and reconstruction are separate stages of the same water damage restoration and repair project.
Water Mitigation
Mitigation focuses on stopping further damage and drying the structure.
Typical work includes:
- Water extraction
- Removal of damaged drywall
- Removal of wet insulation
- Opening wall cavities
- Air movers
- Dehumidifiers
- Moisture monitoring
Reconstruction
Reconstruction restores the building materials removed or damaged during mitigation.
Typical work includes:
- Framing repairs
- Insulation
- Drywall
- Flooring
- Cabinets
- Baseboards
- Trim
- Paint
- Fixtures
Why Both Phases Are Necessary
A property can be completely dry and still be far from finished.
Mitigation makes the structure ready for repair.
Reconstruction makes the property usable again.
Step 1: Confirm the Reconstruction Scope
Before construction begins, the contractor should identify everything that needs to be restored.
A reconstruction scope may include:
- Drywall openings
- Ceiling openings
- Missing insulation
- Damaged flooring
- Removed baseboards
- Cabinet work
- Trim work
- Paint areas
- Fixtures
This is especially important after larger losses because water mitigation may affect several rooms.
For a room-by-room look at common restoration work see water damage restoration cost by room
Step 2: Complete Framing Repairs If Needed
Wet wood framing does not automatically need replacement.
Studs and joists can often be dried.
However, framing repair may be necessary when wood was:
- Physically damaged
- Removed for access
- Deteriorated
- Altered during demolition
Reconstruction work may include:
- Replacing damaged framing
- Adding backing for drywall
- Repairing small framing sections
- Preparing openings for new wall finishes
Framing should be complete before insulation and drywall are installed.
Step 3: Replace Removed Insulation
If insulation was removed during mitigation, it should generally be replaced before the cavity is closed.
Possible locations include:
- Exterior walls
- Ceiling cavities
- Attic areas
- Floor assemblies
- Utility areas
New insulation should not be installed over framing that is still wet.
If the original insulation was saturated, compressed, or preventing drying, removing it may have been necessary.
For more information see wet insulation after water damage
Step 4: Drywall Repair After Water Damage
Drywall repair after water damage is one of the most common parts of reconstruction.
Drywall may have been removed during mitigation because it was:
- Saturated
- Soft
- Sagging
- Delaminated
- Contaminated
- Covering wet insulation
- Preventing airflow
Once the wall or ceiling cavity is ready to close, replacement drywall can be installed.
Typical Drywall Reconstruction Process
Drywall repair may include:
- Measuring the opening
- Installing backing where necessary
- Cutting replacement drywall
- Fastening drywall to framing
- Taping seams
- Applying joint compound
- Sanding
- Matching texture
- Priming
- Painting
For more information see wet drywall after water leak
Does the Entire Wall Need Replacement?
Usually not.
Water mitigation commonly uses selective demolition.
If only the bottom section of a wall was removed, reconstruction may involve replacing only that section.
The repair is then finished and blended into the surrounding wall.
What About Ceiling Repairs?
Ceiling reconstruction often requires careful finishing because repairs are easy to see under overhead lighting.
A ceiling repair may include:
- Replacement drywall
- Seam finishing
- Texture matching
- Primer
- Paint
For related damage see ceiling water damage
Step 5: Flooring Replacement After a Leak
Flooring replacement after leak damage should happen only after the surface underneath is ready.
This is especially important because moisture can remain below finished flooring.
Hardwood
Water-damaged hardwood may develop:
- Cupping
- Crowning
- Swelling
- Gaps
- Finish damage
Some hardwood floors can be dried and retained.
Other floors may require partial or full replacement.
For more information see water damaged hardwood floors repair or replace
Laminate
Laminate often reacts poorly when moisture enters the core.
Swollen seams or edges may remain distorted after drying.
Luxury Vinyl Plank
LVP may resist surface water but still allow moisture to become trapped underneath.
If planks were lifted during mitigation, they may be reinstalled or replaced depending on:
- Product condition
- Locking mechanism
- Installation method
- Subfloor condition
For more information see water damage under flooring
Carpet
Carpet may sometimes be reused after a clean-water loss.
However, padding may require replacement.
The floor underneath should be dry before carpet and padding go back.
Step 6: Repair or Reinstall Cabinets
Kitchen and bathroom water damage frequently affects cabinets.
During mitigation, cabinets may have been:
- Detached
- Removed
- Opened for drying access
- Damaged by swelling
When Can Cabinets Be Reused?
Cabinets may be reusable when:
- Boxes remain structurally sound
- Swelling is limited
- Doors and faces remain functional
- The wall and floor behind them are dry
When Is Replacement More Likely?
Replacement becomes more likely when:
- Particleboard is badly swollen
- MDF has deteriorated
- Panels have delaminated
- Cabinet boxes have lost structural integrity
For kitchen-specific damage see kitchen water damage restoration
For bathroom damage see bathroom water damage restoration
Step 7: Restore Baseboards, Trim, and Finish Carpentry
Baseboards are often removed during mitigation because water can hide behind them.
During reconstruction they may be:
- Reinstalled
- Replaced
- Caulked
- Filled
- Painted
Door casing and other trim may also need repair.
Finish carpentry normally follows major drywall and flooring work.
Step 8: Prime and Paint
Painting usually happens near the end of reconstruction after water damage.
New drywall commonly needs:
- Joint finishing
- Sanding
- Primer
- Finish paint
Existing stained surfaces may also need preparation.
But paint should never be used as a substitute for drying.
A painted surface can look perfect while moisture remains behind it.
What If Mold Is Found Before Reconstruction?
If mold is discovered during mitigation or before a cavity is closed, the affected area should be addressed before permanent reconstruction continues.
Potentially affected materials may include:
- Drywall paper
- Wood framing
- Sheathing
- Dust
- Other organic materials
For more information see mold after water damage
For guidance on when remediation may be needed see when is mold remediation necessary
For the remediation process see what is mold remediation step by step
What Is the Correct Rebuild Order After Water Mitigation?
A typical reconstruction sequence is:
- Verify drying
- Confirm the rebuild scope
- Complete remaining demolition if necessary
- Repair framing
- Install insulation
- Install drywall
- Tape and finish drywall
- Prime repaired surfaces
- Repair or replace flooring
- Reinstall cabinets and fixtures
- Install baseboards and trim
- Paint
- Complete touch-ups
- Perform final cleaning
- Conduct a final walkthrough
Why the Order of Reconstruction Matters
Construction tasks affect one another.
For example:
- Installing flooring before the subfloor is ready can damage the new material
- Installing trim before flooring may create extra rework
- Painting before drywall sanding is complete can ruin the finish
- Reinstalling cabinets too early can block access to unfinished walls
A good reconstruction sequence helps protect completed work and prevents unnecessary labor.
How Long Does Reconstruction After Water Damage Take?
There is no universal timeline.
The schedule depends on:
- Size of the damaged area
- Number of rooms
- Amount of drywall work
- Flooring type
- Cabinet work
- Custom materials
- Material availability
- Required trades
- Insurance coordination
- Inspection requirements
A small rebuild after a localized plumbing leak is very different from a project involving several rooms, flooring, cabinets, ceilings, and paint.
For a broader overview see water damage restoration timeline
Drying Time and Reconstruction Time Are Different
Drying happens first.
Reconstruction happens afterward.
Homeowners should expect those stages to have separate schedules.
Insurance and Reconstruction After Water Damage
Insurance may be involved in the reconstruction phase depending on the cause of loss and applicable policy.
Useful documentation can include:
- Photos
- Mitigation reports
- Drying documentation
- Demolition photos
- Repair estimates
- Material information
- Contractor invoices
For general coverage information see does insurance cover water damage restoration
For claim documentation see water damage insurance claim help
Mitigation Estimate vs Reconstruction Estimate
These usually cover different phases.
A mitigation estimate may include:
- Extraction
- Demolition
- Drying equipment
- Monitoring
A reconstruction estimate may include:
- Insulation
- Drywall
- Flooring
- Cabinets
- Trim
- Paint
- Finish labor
Understanding the difference makes it easier to follow the full water damage restoration and repair process.
Can One Company Handle Both Mitigation and Reconstruction?
Yes, in some cases.
The same restoration company may handle:
- Water extraction
- Structural drying
- Demolition
- Reconstruction
Using one company can simplify communication because the rebuild team already understands what was removed and why.
Other homeowners may use separate mitigation and reconstruction contractors.
If a different contractor performs the rebuild, the reconstruction scope should clearly show:
- What areas were affected
- What materials were removed
- What remains to be restored
For contractor selection guidance see how to choose water damage restoration company
Common Reconstruction Mistakes to Avoid
Closing Walls Before Drying Is Confirmed
This can trap moisture behind new drywall.
Installing Flooring Over a Damp Subfloor
This can damage new flooring and create hidden problems.
Forgetting Insulation
The wall or ceiling assembly should be restored before it is closed.
Painting Over a Water Stain Without Addressing the Cause
Paint can hide discoloration but cannot solve water damage.
Repairing Only the Most Visible Area
The reconstruction scope should match the actual mitigation work.
Ignoring the Original Leak
The source should be corrected before rebuilding begins.
For immediate response guidance see first 24 hours water damage checklist
What Should Be Checked During the Final Walkthrough?
The final walkthrough should evaluate both appearance and function.
Check:
- Drywall seams
- Ceiling finish
- Paint coverage
- Flooring transitions
- Baseboards
- Door trim
- Cabinets
- Fixtures
- Caulk lines
- Cleanup
Compare the Finished Work With the Original Scope
Every area opened during mitigation should be accounted for.
Check Function as Well as Appearance
Doors should open normally.
Cabinet doors should align.
Floor transitions should be secure.
Look Closely at Finish Quality
Check for visible drywall seams, missed paint, gaps, or incomplete caulking.
Confirm the Space Is Ready for Normal Use
Construction dust, debris, temporary protection, and leftover materials should be removed.
Water Damage Restoration and Repair Is a Multi-Stage Process
Water restoration does not necessarily end when the drying equipment leaves.
A complete project often follows this sequence:
Emergency response → water extraction → demolition → structural drying → moisture verification → reconstruction → finishing → final cleanup
For the broader process see water damage restoration homeowner guide
Understanding these stages explains why a home can be dry but still require several reconstruction steps before it is fully restored.
Final Takeaway
Reconstruction after water damage is the phase that turns a dry but unfinished property back into a complete living space.
It may include:
- Insulation
- Drywall repair after water damage
- Ceiling repairs
- Flooring replacement after leak damage
- Cabinet work
- Baseboards
- Trim
- Painting
- Fixtures
- Final cleanup
The most important rule remains:
Do not rebuild over unresolved moisture.
A successful rebuild after water mitigation should restore the damaged building assembly in the correct order.
That is what turns emergency drying into a complete water damage restoration and repair project instead of a cosmetic repair that only hides what happened behind the wall.
FAQ About Reconstruction After Water Damage
1. When can reconstruction after water damage begin?
Reconstruction can usually begin after the original water source has been corrected, standing water has been removed, unsalvageable materials have been taken out, and the remaining structure has reached appropriate drying conditions.
The decision should not be based only on appearance.
Framing, subfloor, wall cavities, and other affected materials may need moisture verification before new materials are installed.
If drywall, insulation, flooring, or cabinets are installed too early, moisture can become trapped behind them.
2. What is usually included in a rebuild after water mitigation?
The reconstruction scope depends on what was damaged and what was removed during mitigation.
It may include:
- Framing repair
- Insulation
- Drywall
- Ceiling repair
- Texture matching
- Primer
- Paint
- Flooring
- Baseboards
- Trim
- Cabinets
- Fixtures
A small water loss may only require drywall, baseboard, and paint work.
A larger project can involve several rooms and multiple trades.
3. Does drywall repair after water damage require replacing the whole wall?
No.
Selective drywall removal is common during mitigation.
If only the lower section of a wall was removed, reconstruction may involve replacing only that section.
The new drywall is then taped, finished, textured if necessary, primed, and painted to blend with the existing surface.
The amount of drywall replacement depends on what became wet and what had to be removed to dry the cavity properly.
4. When is flooring replacement after a leak necessary?
Flooring replacement may be necessary when the material has permanent physical damage or cannot be restored successfully.
Examples include:
- Swollen laminate
- Delaminated flooring
- Damaged carpet padding
- Flooring removed to access wet subfloor
- Hardwood that remains permanently damaged
The condition underneath the flooring is equally important.
New flooring should not be installed over a damp subfloor just because the visible surface looks dry.
5. How long does reconstruction after water damage take?
There is no fixed timeline.
The duration depends on:
- Size of the damaged area
- Number of rooms
- Drywall work
- Flooring type
- Cabinet work
- Material availability
- Number of trades involved
- Insurance coordination
- Inspection requirements
A small repair may be relatively straightforward.
A larger water damage restoration and repair project may involve insulation, drywall, flooring, cabinets, trim, paint, and several separate stages.
The key is that reconstruction should follow verified drying rather than being rushed to meet an arbitrary schedule.

