

Quick Answer: What Should You Do After Pipe Burst Water Damage?
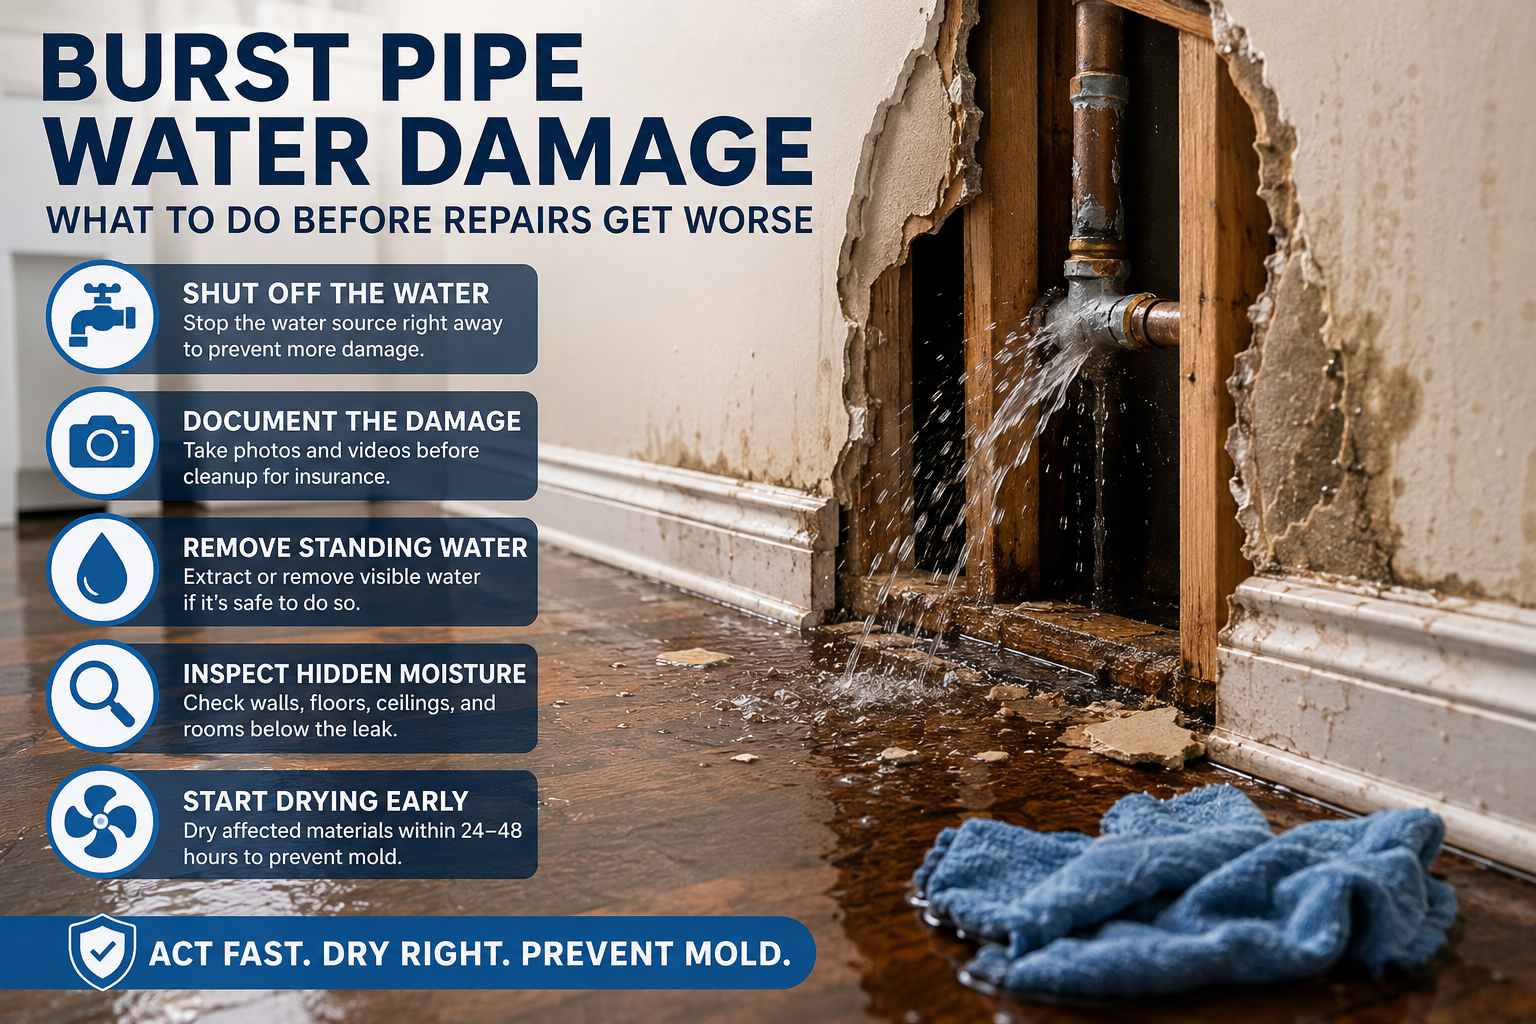
Pipe burst water damage should be handled immediately because water can spread into drywall, insulation, flooring, ceilings, cabinets, baseboards, and wall cavities before the full damage is visible. The first steps are to shut off the water source, avoid electrical hazards, document the damage, remove standing water if safe, inspect hidden moisture, and begin drying affected materials before repairs.
A burst pipe is not only a plumbing problem. It can quickly become plumbing leak water damage throughout the structure. A broken supply line can soak walls, floors, trim, subflooring, ceilings, and insulation. Frozen pipe water damage can be especially difficult because the pipe may split inside an exterior wall, basement, crawl space, garage, attic, or ceiling before water becomes visible.
The American Red Cross advises turning off water at the main valve if water pipes are damaged and calling a plumber for assistance. EPA guidance says moisture control is the key to mold control and recommends drying water-damaged areas and items within 24–48 hours when possible.
For the full drying process, see structural drying after water damage
Pipe burst water damage should be handled by stopping the water source, documenting the damage, removing standing water, checking walls, floors, ceilings, insulation, cabinets, and rooms below, then drying affected materials before repairs. Burst pipe cleanup may include water extraction, moisture readings, selective drywall removal, baseboard removal, flooring inspection, structural drying, and mold prevention. Plumbing leak water damage can spread beyond the visible puddle, especially when water enters wall cavities, insulation, or subflooring. Frozen pipe water damage may occur inside exterior walls, basements, crawl spaces, garages, attics, and ceilings. Wet walls from pipe leak damage should not be patched or painted until hidden moisture is inspected.
Why Pipe Burst Water Damage Gets Worse Quickly
A burst pipe can release water fast, but the visible puddle is only part of the damage. Water follows gravity, framing, pipe openings, wall cavities, flooring seams, insulation, and trim lines. It may run under floors, wick up drywall, soak insulation, move behind cabinets, or drip into ceilings below.
Common causes of pipe burst water damage include:
- Frozen pipe expansion
- Supply line failure
- Aging plumbing line
- Loose pipe connection
- Pipe corrosion
- High water pressure issue
- Failed plumbing repair
- Exterior wall pipe freeze
- Crawl space or basement pipe freeze
- Appliance supply line failure
A plumber repairs or replaces the damaged pipe. Burst pipe cleanup is a different part of the project. The pipe repair stops new water from entering. Water mitigation addresses the moisture already inside drywall, flooring, cabinets, insulation, and other building materials.
For a broader homeowner guide, see water damage restoration homeowner guide
First Steps After a Burst Pipe
The first priority is stopping the water. The second priority is preventing hidden moisture from being covered by repairs.
After a pipe burst:
- Shut off the main water valve if safe and accessible
- Avoid standing water near outlets, cords, appliances, or electrical panels
- Do not touch wet electrical items
- Take photos and videos before cleanup
- Move contents away from wet areas
- Remove standing water if safe
- Check flooring, baseboards, walls, cabinets, and ceilings
- Check the room below the leak
- Contact a plumber for the pipe repair
- Contact a water mitigation contractor if building materials are wet
For urgent water situations, see emergency water damage restoration guide
Burst Pipe Cleanup: More Than Removing the Puddle
Burst pipe cleanup should focus on where water traveled, not only where water is visible. A floor may look dry while moisture remains below the surface. A wall may look normal while insulation is wet inside the cavity. A ceiling stain may appear only after water has already moved through framing and drywall.
Materials that may need inspection include:
- Drywall
- Insulation
- Flooring
- Underlayment
- Subflooring
- Baseboards
- Cabinets
- Vanities
- Ceiling drywall
- Wall cavities
- Trim and door casings
- Nearby rooms and closets
A proper cleanup plan answers four questions:
- Where did the water start?
- Where did the water travel?
- Which materials are wet?
- Can those materials dry safely in place?
The ANSI/IICRC S500 standard describes procedures and precautions for professional water damage restoration in residential, commercial, and institutional buildings, including systems and personal property inside those structures.
Plumbing Leak Water Damage
Plumbing leak water damage may come from a sudden pipe burst or a slower leak that was hidden before the break became obvious. A sudden supply line break can flood a room quickly. A hidden plumbing leak may create wet drywall, damp insulation, swollen trim, flooring damage, or musty odor before visible water appears.
Warning signs of plumbing leak water damage include:
- Wet drywall
- Soft wall surface
- Bubbling paint
- Swollen baseboards
- Warped flooring
- Musty odor
- Ceiling stain below plumbing
- Water sound inside walls
- Damp cabinet base
- Elevated moisture readings
A plumbing leak does not always show directly below the damaged pipe. Water can travel along framing, pipe lines, drywall seams, insulation, and flooring transitions before becoming visible somewhere else.
For wet drywall guidance, see wet drywall after water leak
Frozen Pipe Water Damage
Frozen pipe water damage often happens when plumbing is located in cold or poorly heated areas. Exterior walls, crawl spaces, basements, garages, attics, and utility areas are common concern zones. The Red Cross notes that frozen pipes are commonly found against exterior walls or where the water service enters through the foundation; it also advises keeping the faucet open while thawing and avoiding open-flame devices.
Signs of frozen pipe water damage include:
- Low or no water flow from a faucet
- Water stain on a wall or ceiling after freezing weather
- Wet insulation in a crawl space or basement
- Dripping from a ceiling after thawing
- Damp exterior wall
- Sudden puddle near a pipe chase
- Soft drywall near plumbing
- Moisture near a garage, attic, or basement pipe
Frozen pipe situations should be handled carefully. If the pipe is inaccessible, actively leaking, or difficult to thaw safely, a licensed plumber should handle the plumbing side. After the pipe is repaired or isolated, the affected building materials still need to be inspected and dried.
Why Frozen Pipe Leaks Can Be Hidden
A pipe can split inside a wall, ceiling, crawl space, or attic before water becomes visible inside the living space.
Why Thawing Can Reveal Damage
Water may begin leaking only after the frozen section thaws and water flow returns.
Why the Room Below Matters
Water from an upstairs pipe can move into the ceiling below before the upper room looks severe.
Simple Rule
Treat frozen pipe water damage as both a plumbing issue and a water mitigation issue.
Wet Walls From Pipe Leak
Wet walls from pipe leak damage should not be patched or painted until moisture is checked. Drywall can wick water upward from the floor line. Insulation inside the wall may stay wet after the visible surface begins to dry. Baseboards can also trap moisture where drywall meets flooring.
Signs of wet walls from pipe leak damage include:
- Bubbling paint
- Soft drywall
- Staining near baseboards
- Swollen trim
- Musty odor
- Wall feels cool or damp
- Peeling tape or texture
- Moisture readings above nearby dry areas
If insulation is wet inside the wall, drying may require selective opening. If drywall is soft, sagging, crumbling, or staying wet, removal may be needed before repair.
For mold behind walls, see mold behind drywall signs removal
Floors, Ceilings, and Rooms Below
A burst pipe often affects more than the room where the leak started. If the pipe burst upstairs, water may enter the ceiling below. If the pipe burst inside a wall, water may move downward into flooring, cabinets, subflooring, or lower-level rooms.
Areas to check include:
- The room where the pipe burst
- Adjacent rooms
- Closets
- Hallways
- Ceiling below the leak
- Basement below the leak
- Flooring transitions
- Cabinets and vanities
- Exterior wall cavities
- Utility spaces
A ceiling stain below the leak can mean water has already passed through upper flooring, framing, insulation, or drywall. Flooring damage may also be hidden under vinyl plank, laminate, hardwood, carpet, or underlayment.
For ceiling-related damage, see ceiling water damage http://totalhomerescue.pro/guides/ceiling-water-damage
For flooring concerns, see water damage under flooring http://totalhomerescue.pro/guides/water-damage-under-flooring
When Drying May Not Be Enough
Some materials can dry in place when the water source is clean, the pipe is shut off quickly, and moisture readings improve. Other materials may need removal when they are saturated, swollen, weakened, contaminated, or unable to dry properly.
Drying may be possible when:
- The water source was clean
- The pipe was shut off quickly
- Materials remain firm
- Moisture readings improve
- Water did not reach insulation
- Flooring did not swell
- Cabinets did not absorb water
- No musty odor is present
Removal may be more likely when:
- Drywall is soft or crumbling
- Insulation is wet
- Baseboards are swollen
- Flooring is warped
- Cabinets absorbed water
- Ceiling is sagging
- Water sat too long
- Mold concern is present
- Moisture readings stay elevated
The decision should be based on water source, material condition, moisture readings, and whether affected materials can dry safely in place.
Professional Water Mitigation After a Burst Pipe
Professional mitigation may be needed when pipe burst water damage spreads into walls, floors, ceilings, insulation, cabinets, or multiple rooms. A plumber repairs the pipe. A water mitigation contractor addresses moisture in the structure.
A professional process may include:
- Source control
- Water extraction
- Moisture inspection
- Thermal imaging when appropriate
- Selective material removal
- Air movers
- Dehumidifiers
- Moisture monitoring
- Documentation
- Drying verification
- Repair planning
For the mitigation process, see water mitigation process
Mold Concerns After Pipe Burst Water Damage
Mold concern increases when moisture remains in drywall, insulation, flooring, cabinets, or wall cavities. EPA explains that there is no practical way to eliminate all mold spores indoors, so indoor mold growth is controlled by controlling moisture.
Mold concern may be higher when:
- Wet walls were not opened or dried
- Insulation stayed wet
- Flooring trapped moisture
- Baseboards stayed damp
- Cabinets absorbed water
- Musty odor appeared
- Water reached multiple rooms
- Drying started late
- Moisture readings remained elevated
Mold wording should be handled carefully. A musty odor or visible growth may indicate a concern, but the correct response depends on the materials, moisture source, and inspection findings.
For mold after leaks, see mold after water damage Virginia
For prevention guidance, see how to prevent mold growth Northern Virginia
For hidden signs, see signs of hidden mold in your home
Burst Pipe Cleanup and Repair Order
The order matters. If repairs begin before moisture is controlled, the same drywall, flooring, trim, or ceiling areas may need to be opened again.
A safer repair order is:
- Stop the water source
- Repair or isolate the pipe
- Document the damage
- Extract standing water
- Inspect affected materials
- Remove wet materials when needed
- Set drying equipment
- Monitor moisture
- Confirm dryness
- Repair drywall, flooring, trim, and paint
For insurance documentation, see water damage insurance claim help
For coverage questions, see does insurance cover water damage restoration
Common Mistakes Homeowners Make
Many burst pipe repairs get worse because visible water is cleaned up while hidden moisture remains.
Common mistakes include:
- Not shutting off the water quickly
- Waiting too long to document damage
- Only drying the visible puddle
- Not checking wall cavities
- Not checking insulation
- Not checking the ceiling below
- Painting wet drywall
- Reinstalling baseboards too early
- Using only household fans
- Ignoring musty odor
- Assuming plumbing repair solves water damage
A repaired pipe stops new water from entering, but it does not dry materials that already absorbed water.
Local Water Damage and Mold Resources
Pipe burst water damage often connects with water mitigation, structural drying, wet drywall, flooring damage, ceiling damage, mold prevention, and insurance documentation.
FAQ: Pipe Burst Water Damage
1. What should I do first after pipe burst water damage?
After pipe burst water damage, shut off the water source first. If the pipe is still releasing water, use the main shutoff valve if it is safe and accessible. Avoid standing water near outlets, cords, appliances, or electrical panels. Then document the damage with photos and videos before cleanup.
Next, remove standing water if safe, move contents away from wet areas, and check nearby walls, floors, baseboards, cabinets, and ceilings below. Call a plumber for the pipe repair, but remember that plumbing repair and burst pipe cleanup are different steps. The pipe repair stops the leak. Cleanup and drying address water already inside the structure.
2. How serious is plumbing leak water damage?
Plumbing leak water damage can be serious because water may spread behind walls, under floors, into insulation, and into ceilings below. Even if the surface looks dry, hidden materials may remain wet. This is especially common when a pipe bursts inside a wall or ceiling.
The damage is more concerning when drywall is soft, baseboards are swollen, flooring is warped, insulation is wet, a musty odor appears, or moisture readings stay elevated. The sooner the source is stopped and the structure is dried, the better the chance of reducing secondary damage.
3. What should I do after frozen pipe water damage?
After frozen pipe water damage, shut off the water if a pipe has split or water is leaking. If the frozen pipe is accessible and not actively leaking, thawing should be done carefully and safely. Do not use open flames. If the pipe is inaccessible, if the frozen area cannot be found, or if the pipe may be damaged, call a licensed plumber.
After the pipe issue is handled, inspect surrounding materials. Frozen pipe leaks often happen inside exterior walls, ceilings, basements, crawl spaces, garages, and attics. Wet drywall, insulation, flooring, or ceiling materials may need drying or removal before repairs.
4. Can wet walls from a pipe leak dry on their own?
Sometimes wet walls from pipe leak damage can dry if the water source was clean, the leak was stopped quickly, the drywall is firm, insulation is not wet, and moisture readings improve. However, walls should not be patched or painted until the wall cavity is checked.
If drywall is soft, paint bubbles, baseboards swell, insulation is wet, or a musty odor appears, drying on its own may not be enough. Selective removal may be needed so hidden moisture can be addressed.
5. When should I call a water damage contractor after a burst pipe?
You should call a water damage contractor when water reaches drywall, flooring, insulation, baseboards, cabinets, ceilings, or multiple rooms. You should also call if the leak was hidden, if there are wet walls, if the ceiling below is stained, if the area smells musty, or if materials remain wet after surface cleanup.
A water damage contractor can help identify affected materials, extract standing water, set drying equipment, monitor moisture, document damage, and confirm dryness before repairs. This helps prevent covering wet materials with new drywall, flooring, trim, or paint.
Final Takeaway
Pipe burst water damage should not be judged by the amount of visible water. A burst pipe can push water into walls, floors, ceilings, insulation, cabinets, and rooms below. Burst pipe cleanup should focus on stopping the source, documenting damage, extracting water, checking hidden moisture, drying affected materials, and repairing only after moisture is controlled.
Whether the issue is plumbing leak water damage, frozen pipe water damage, or wet walls from pipe leak damage, the safest rule is the same: stop the water, repair the pipe, inspect the structure, dry or remove wet materials, confirm dryness, and only then rebuild.

